Finishing touches
With a little over a month to go before Brettell Road is back on the road*, I’ve been finishing a few things off.
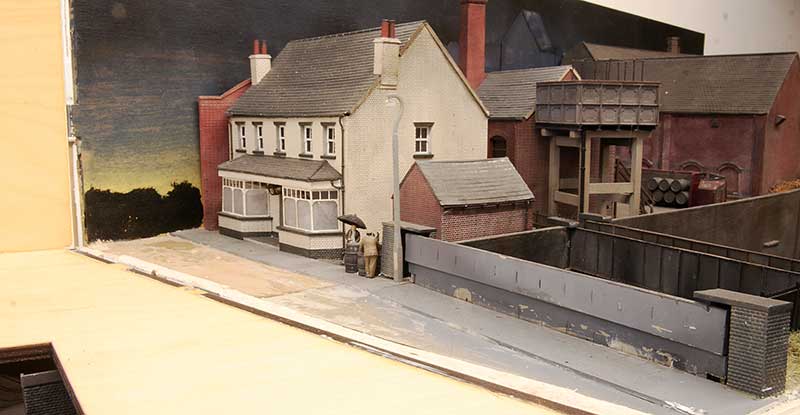
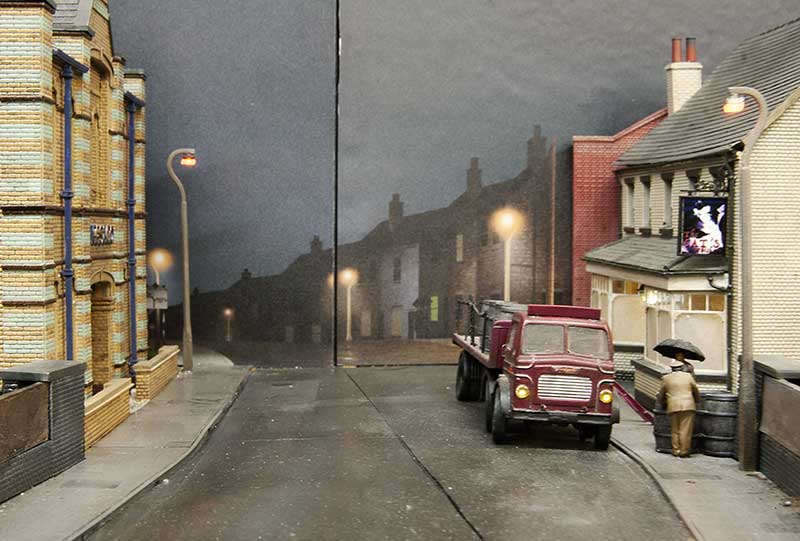 The last backscene is now in place so the road in the middle of the layout now gives the impression it goes somewhere. The Leyland Steer seems to have lost its licence plate somewhere.
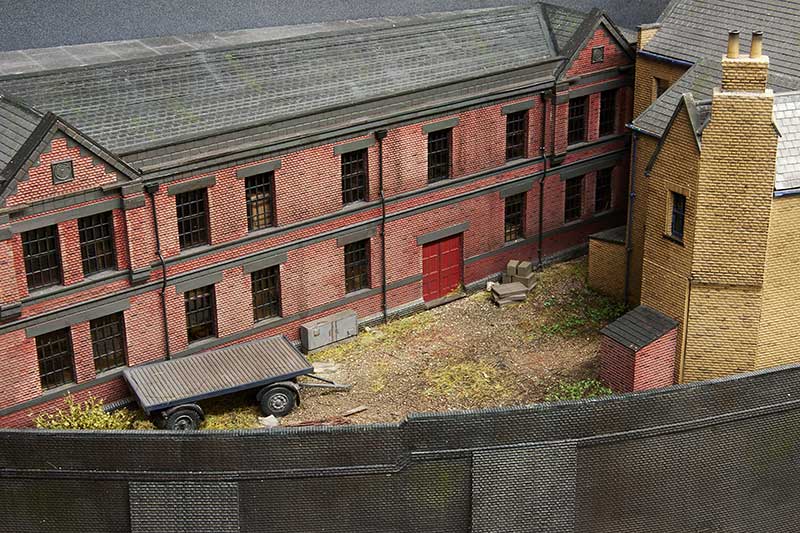 The little back yard on board 2 is done – I wanted a used but not particularly looked after feel.
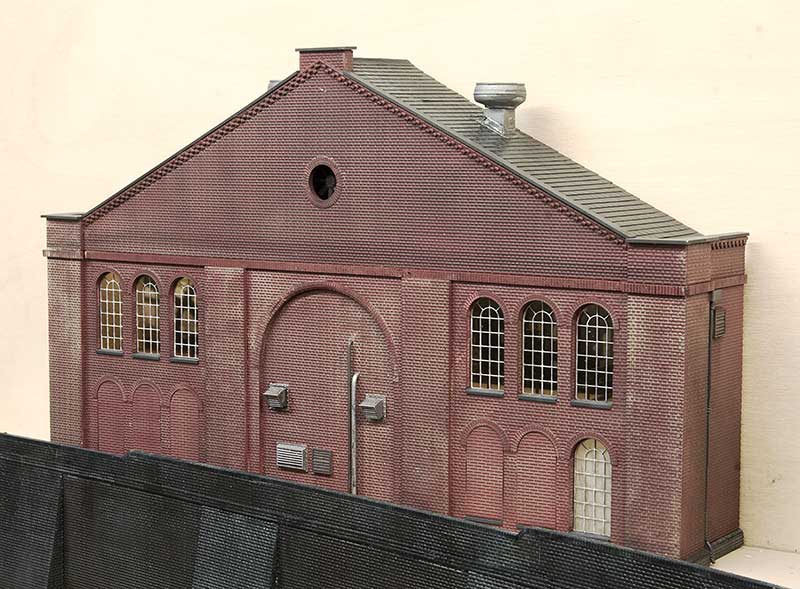
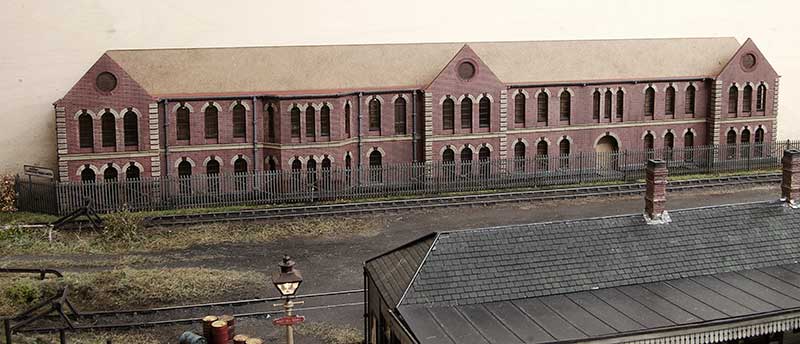
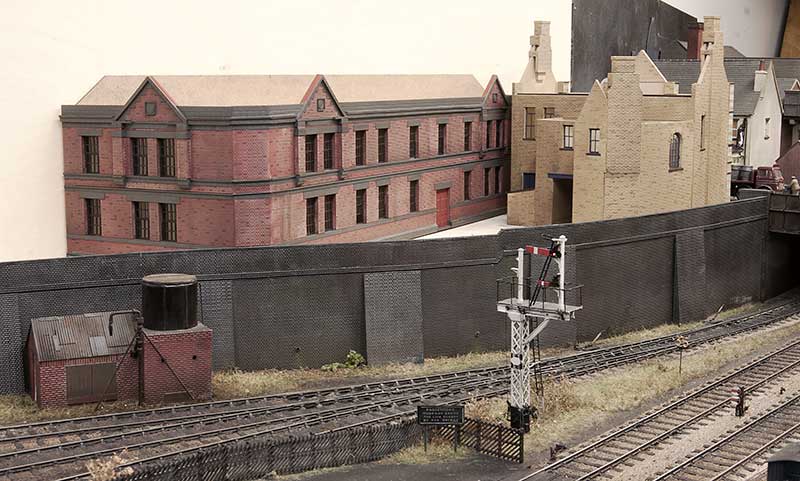
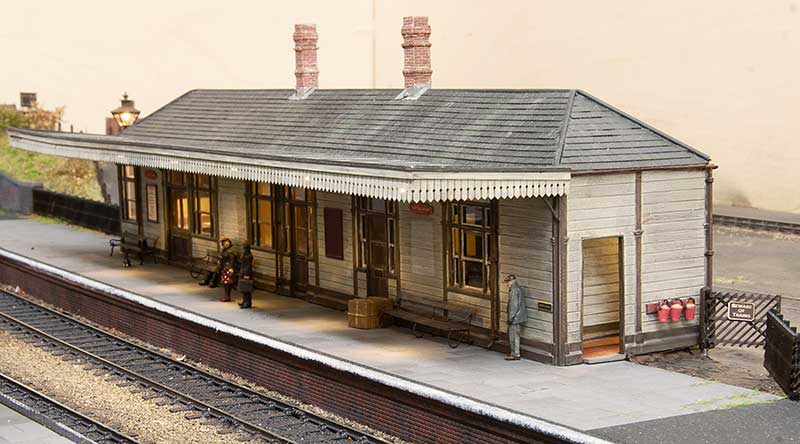
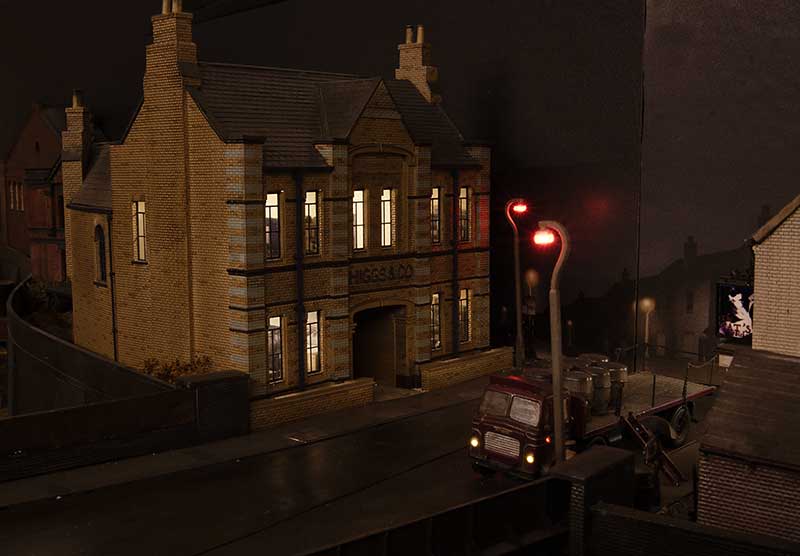 I realised I’ve not actually taken any images of this building in its finished state before now.
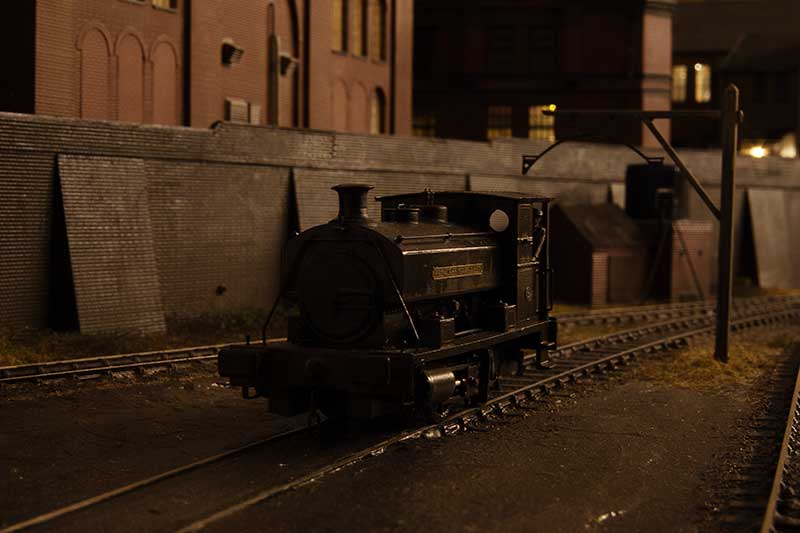 Princess Margaret heads back to the Wallows for the evening.
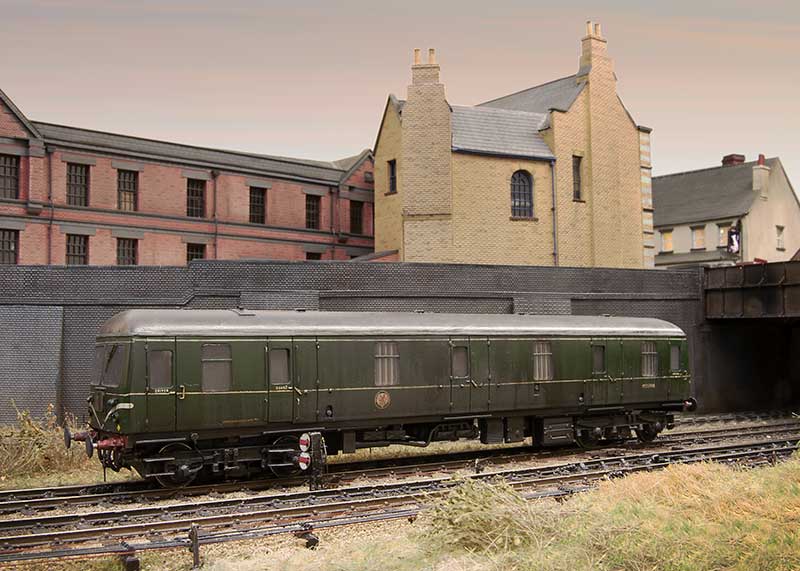
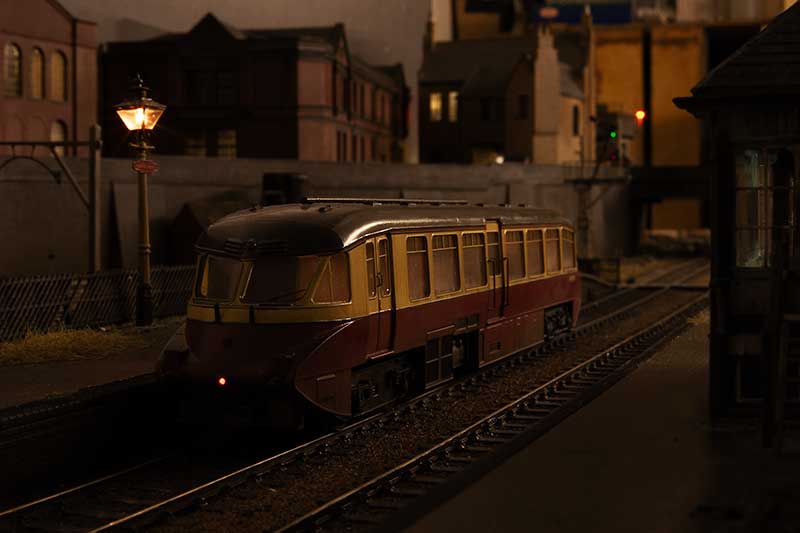 GWR railcar catches the last of the sun as it heads off to Dudley.
* The show is a local one on the 7th October. Click here for more info.
Latest building and what does it have to do with lions?
 This is my latest building for Brettell road and likely to be the last but one physical model building for the layout. I have plenty more buildings to create yet but as those will be on the backscene they will need to be illustrated instead.
As usual it takes its inspiration from a local structure and this time its the Lion Health building in Stourbridge. Or at least a bit of it. Construction is the same as the others featured recently so I wont go over old ground again. Before it was a health centre the Lion Health building was an Ironworks built by Foster, Rastrick and Company in 1821. John Urpeth Rastrick was originally from Morpeth and had previously constructed an early railway locomotive for Richard Trevithick in 1808. The company would continue to produce steam engines as well as proving machines for chain cable, saws, mills, and boilers. It also produced structural components for buildings, bridges and gas works and in 1825 it listed railway components in a catalogue of products including rail, sleepers and chairs. Its fourth locomotive, Agenoria, was built for the Earl of Dudley’s railway and it survives to this day at the National Railway Museum. The company fared far worse than Agenoria and it was officially dissolved on 20 June 1831 and it was absorbed into the Stourbridge Iron Works of John Bradley & Co. James Foster was already the major partner (John Bradley was his half brother) and after 1832 James became the sole owner.
The site went through several more owners but they kept the name John Bradley & Co. (Stourbridge) Ltd. The first was when, in 1919, the Stourbridge Iron Works were sold to a company owned by Edward J. Taylor and then in the interwar period, N. Hingley & Sons Ltd took over but it still continued to trade under the John Bradley & Co name until 1963. The company was finally wound up in 1966 but the Stourbridge Ironworks continued as a rolling mill within the F.H. Lloyd Group until 1982. The building became derelict was nearly destroyed completely due to a fire in 2004. In 2012 it was renovated to become Lion Health which opened in 2014. In 2009 a couple of urban explorers managed to get in and took some pictures, these can be seen here.
What have lions got to do with any of this?
In 1829 Foster, Rastrick and Company built a locomotive for the Delaware & Hudson Canal Company in the USA and this loco, Lion, or rather the Stourbridge Lion is noted to be one of the first foreign built locomotives to be operated in the United States, and one of the first locomotives to ever operate outside Britain. The locomotive performed well in its first test in August 1829 but was found to be too heavy for the track and was never used for its intended purpose of hauling coal trains. Parts of this locomotive also survive and are on display at the B&O Railroad Museum in Baltimore.
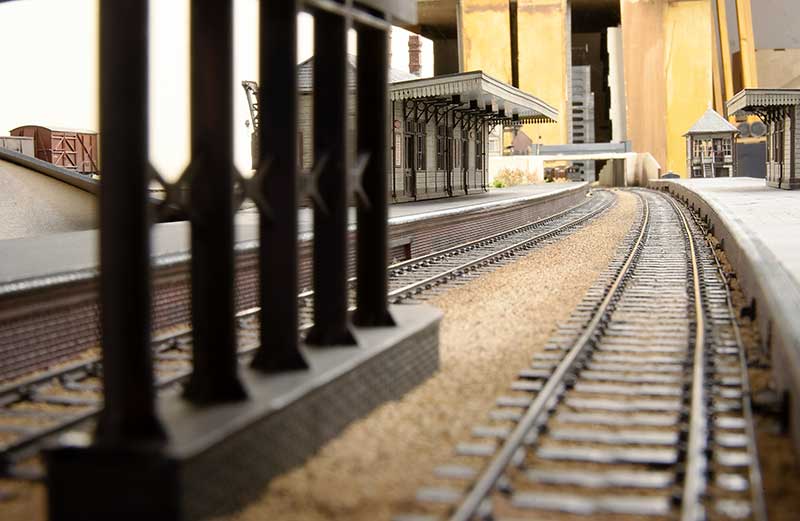
 A view from the platform. I think i’ll tone the lighting down a bit more.
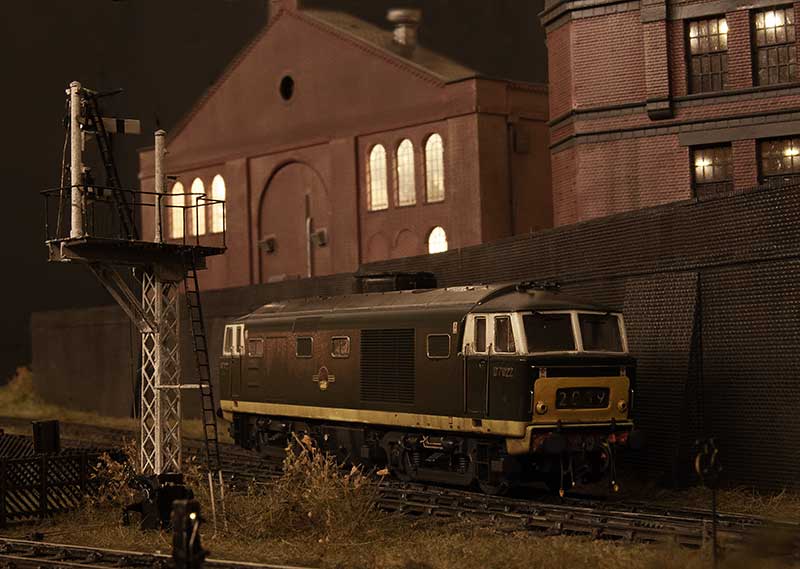 The recently completed Hymek trundles past.
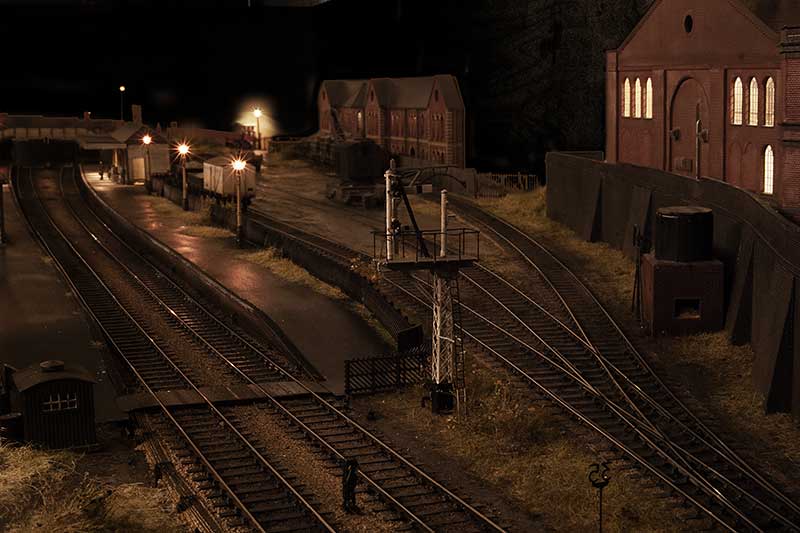
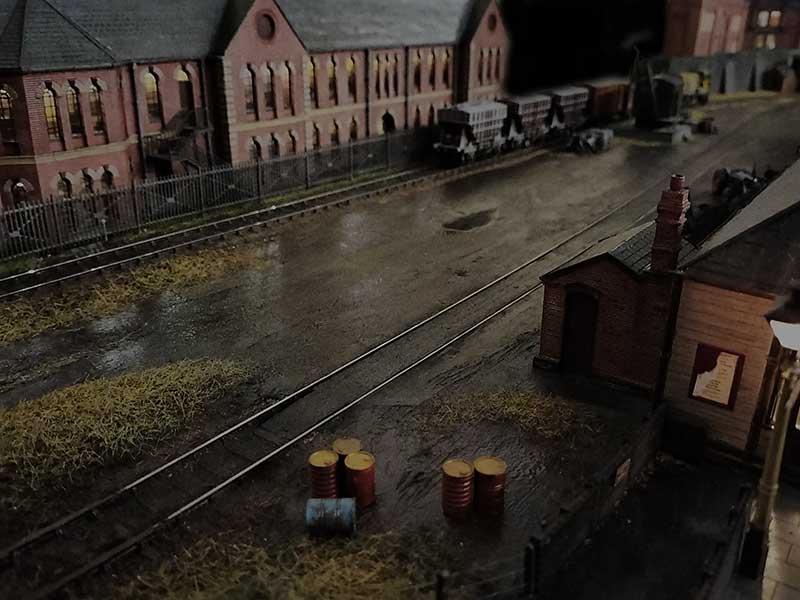
Below are a couple of overall layout shots which I think captures the wet look I’m after. The last one from my phone so apologies for the lack of depth of field.
Tired of tiles!
After working my way through a lot of laser cut strips of tiles I can call my building(s) project effectively done. 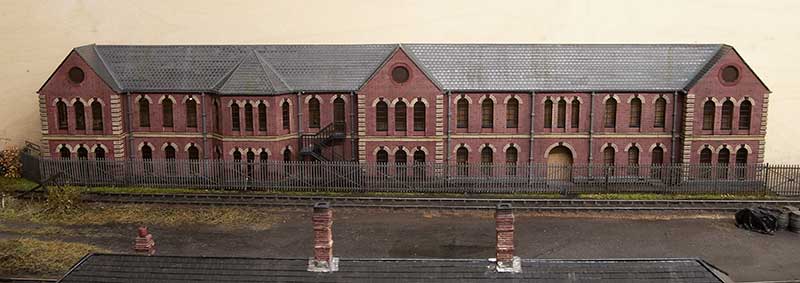 There are several schools of thought when it comes to what to do with low relief buildings. The easiest is to keep them parallel to the backscene however if you don’t (as I haven’t) then the roof can actually become a little bit of a problem area. Theres 2 main ways to address this, Keep the pitch of the roof the same and cut the top at an angle. Or keep the top parallel to the rest of the building and adjust the pitch. My personal opinion is that the latter is the better option. The pitch on my acorn building is significantly different from the left end to the right end. One advantage of using tile strips over embossed plasticard is you can adjust the rows to compensate for this and hopefully no one will notice what trickery you’ve been up to!
 The same applies to this building although it’s not quite as dramatic.
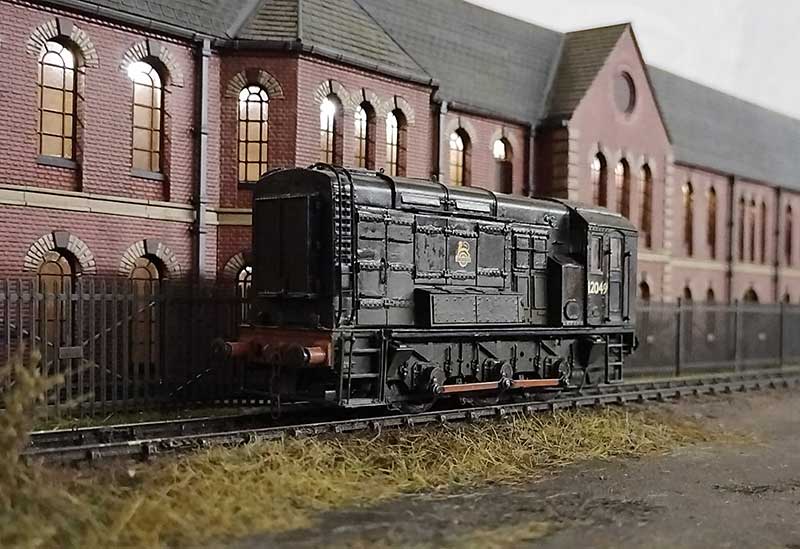
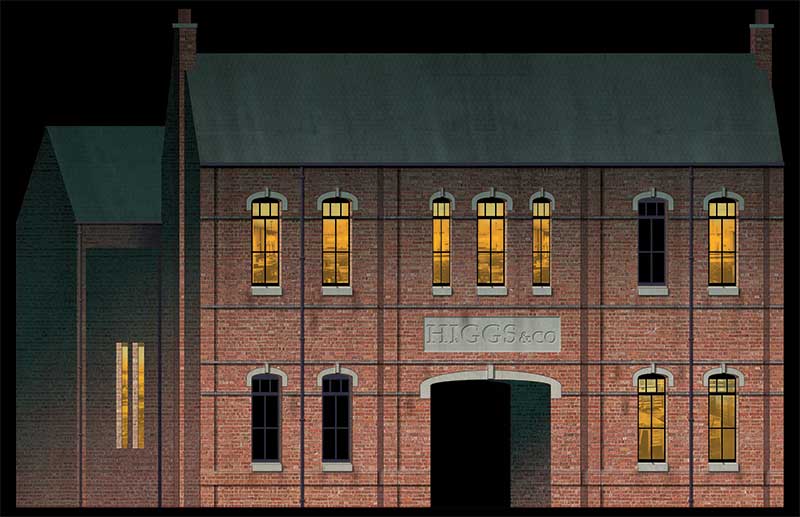
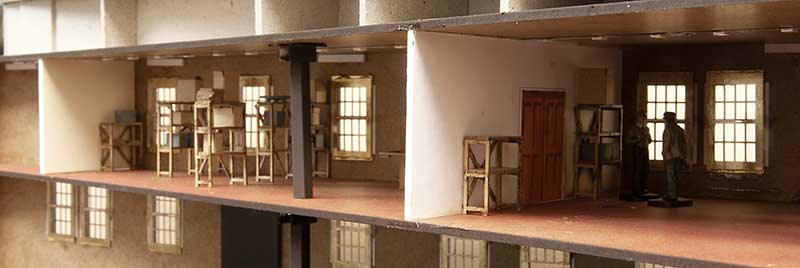 The thing with lighting buildings is they look a bit weird if they are just empty boxes. I don’t feel you need to model everything inside though, just enough clutter to give a hint of something inside. The shelving and cardboard boxes are from scale model scenery. I have found its something people at shows to look for and I think is nice to have some little ‘treasures’ that people can discover for themselves.
  The Higgs and Co. building also has some ‘officey’ clutter. In the late 50s offices seemed to be laid out more like a school classroom than the more ergonomic arrangement we see now.
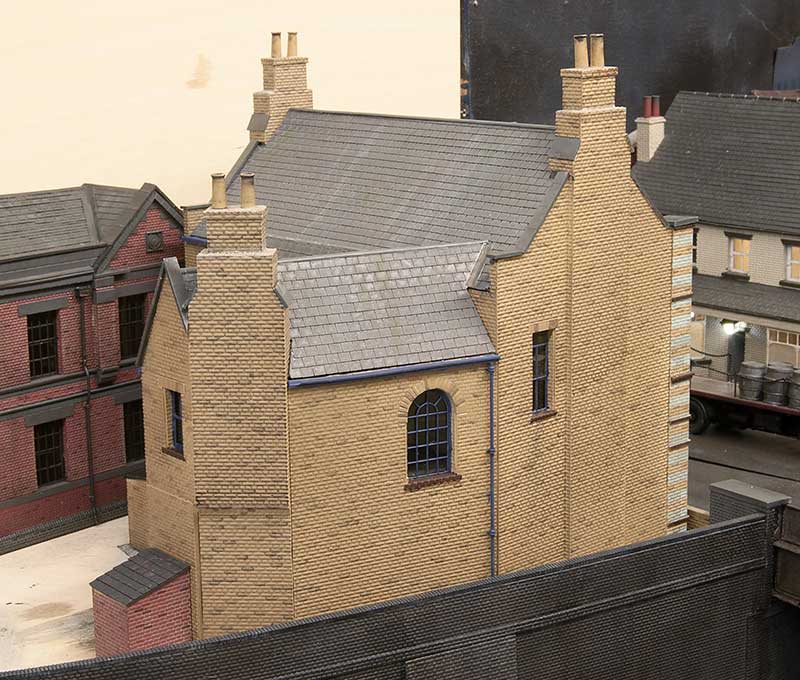 The roof of the rear of the Higgs building has some weird shapes that were a bit of a faff to work out if I’m honest.
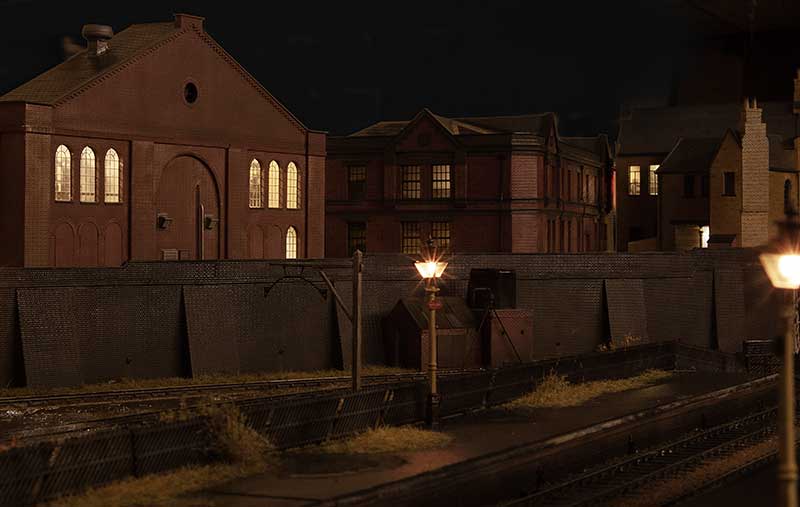
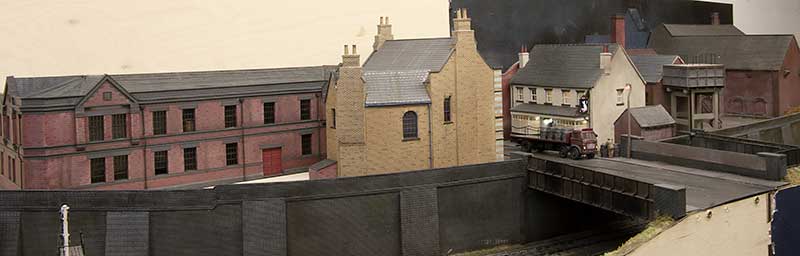 I do feel that the middle of the layout has a suitable black country-ish feel to it now.
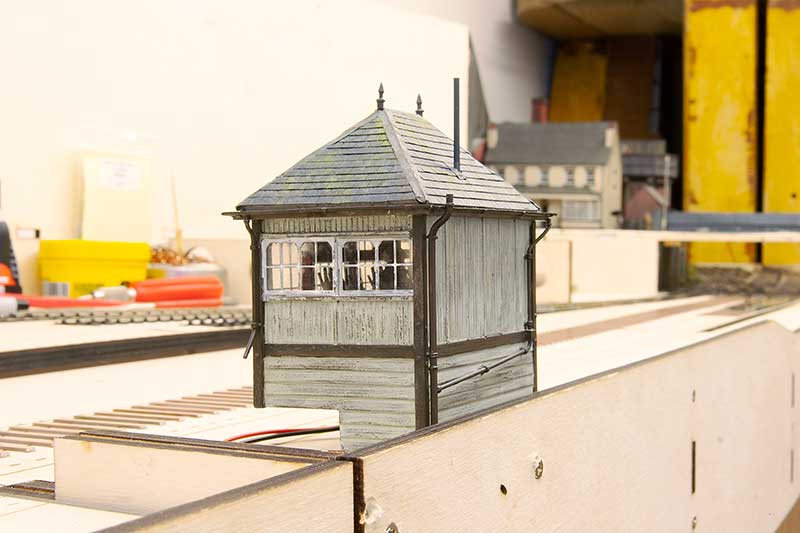
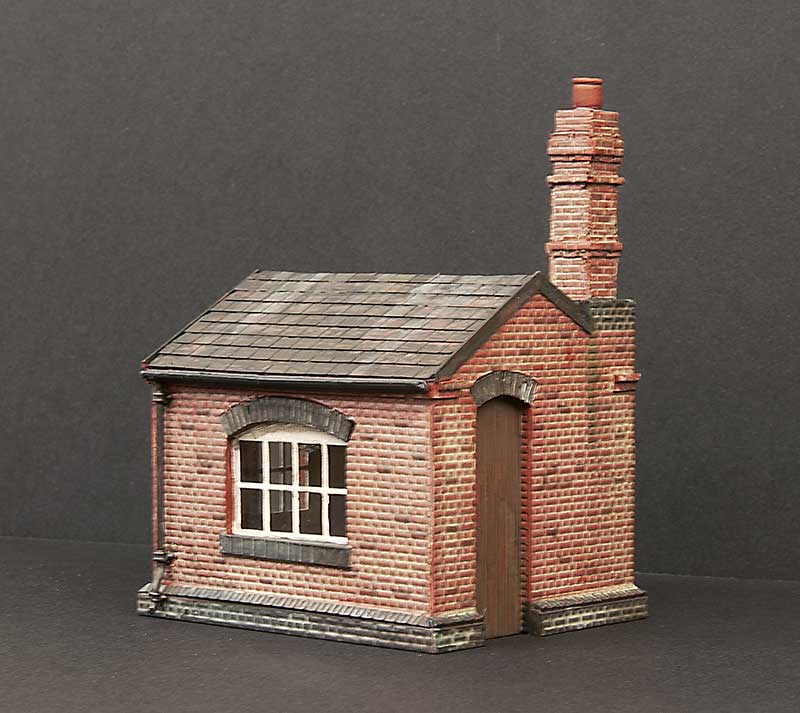 One little building I bunged together is this little weighbridge that will sit behind the main station building. Its based on the one at Wombourne (See here) and I was initially attracted to its over the top chimney and the way its just stuck in a corner. I did have to reel my enthusiasm in a little as the chimney at Wombourne matches the station so to model it exactly as it was when the ones on my station don’t look anything like, would have been a little weird.
Below a few pictures, I feel the last one really captures the feel I want for the layout.
building boom – now painting boom
Ive been busy painting. Not a huge amount to say really so I will let the images do the talking. Next will be roofs and tiling. Lots and lots of tiling!
Building boom
In an attempt to keep some momentum going I’ve been doing more building work. This time for the right hand end of the new bit.
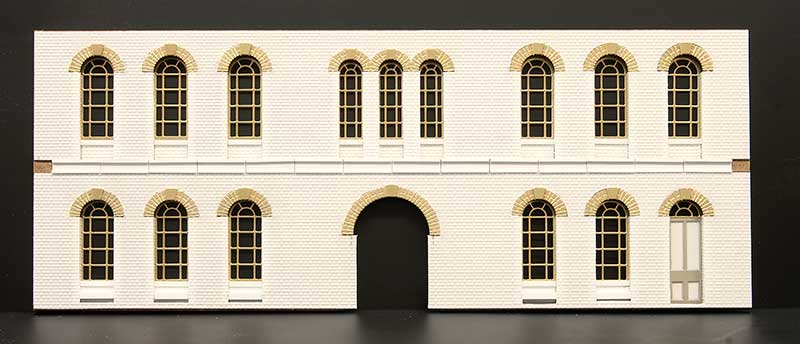
 This building is based roughly on the office building from Birmingham central goods. Same method as before but this time using Brassmasters etched windows.
 Originally the area in question was the end backscene of the original layout and this drawing was based very loosely on the Harris and Pearson building on the real Brettell Lane (see here for more info). The original basic drawing was modified and sent to Tim to be turned into an MDF carcass.
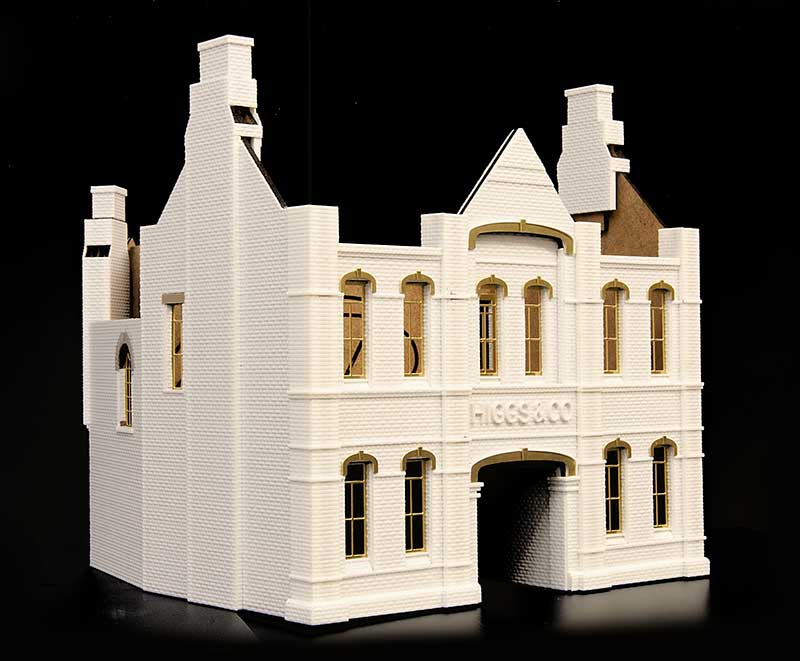 And here is the result so far. Windows are a combination of my own and Brassmasters etches.
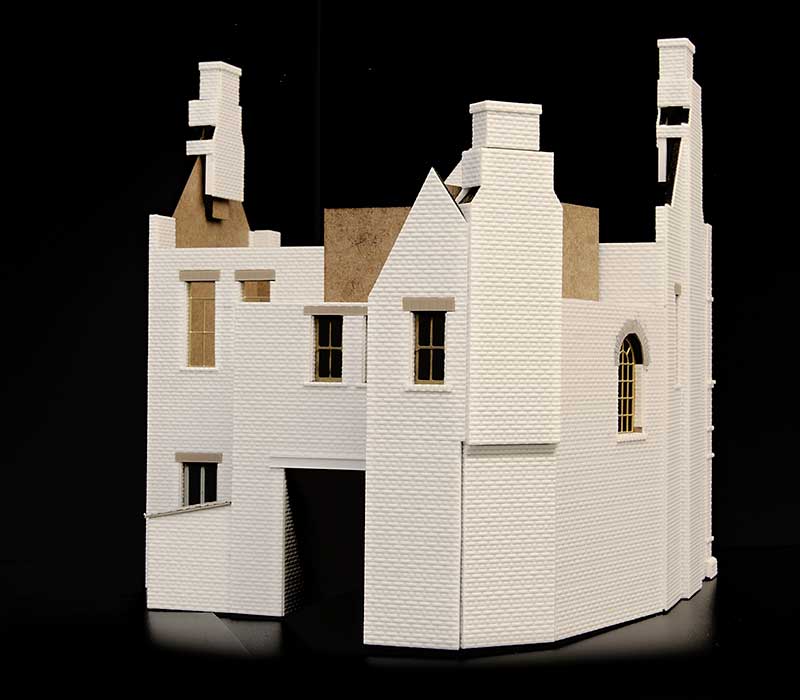 This is the much less ornate but somehow at least as interesting rear view.
  A rough idea of where it all goes.
From Little Acorns, Part 2
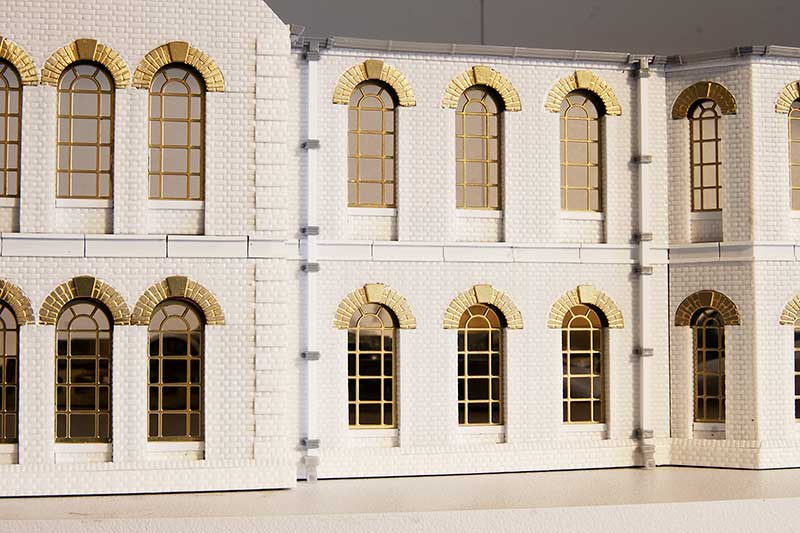 Work continues on my latest building. Gutters are from Modelu. When I last used Modelu guttering I found getting it stuck on was quite problematic however this time I tried Ultraglue from MIG (which I’ve mentioned here before) and I am pleased to report it works very well.
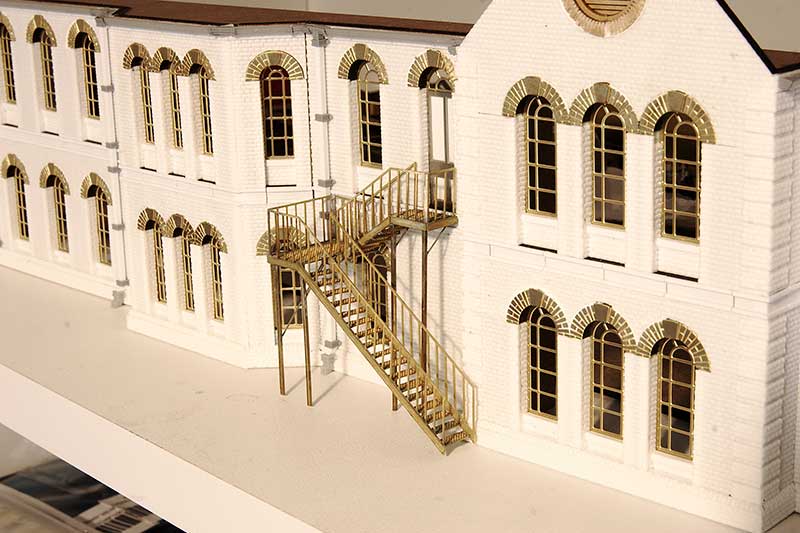 Fire escape from Langley Models. A few people noticed the upper door in my last post.
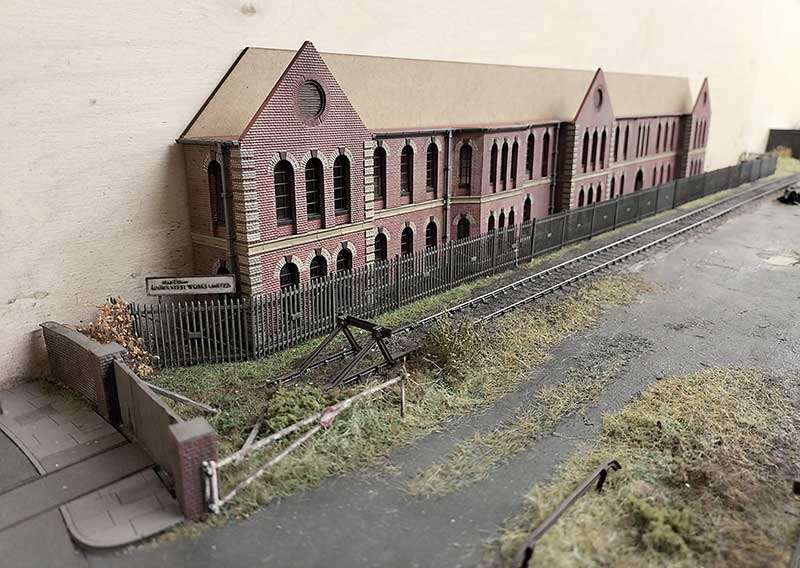
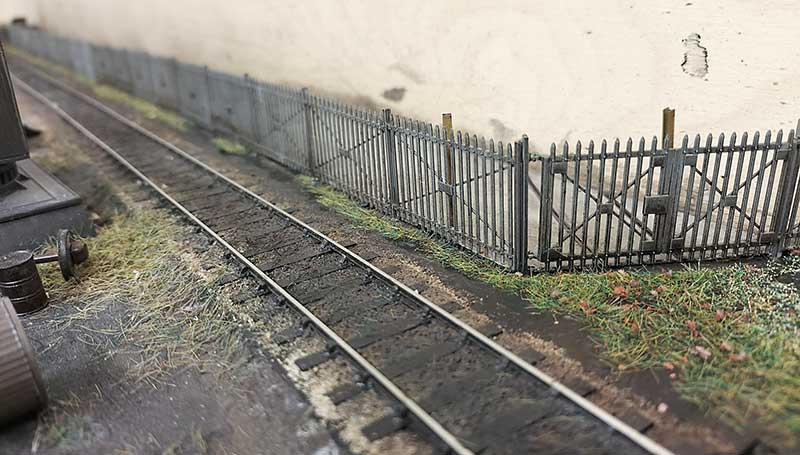
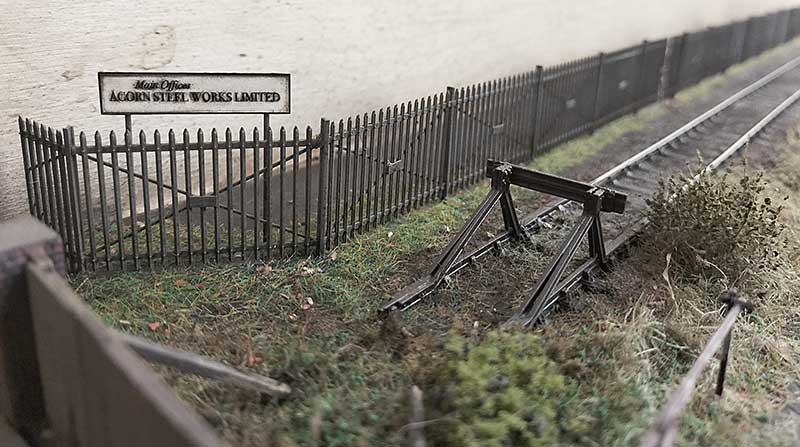 I’ve started to work on the base for the building to sit. The fence is Knightwing security fencing modified to resemble that seen in pictures of the real Round Oak. The sign was part of the etch I drew up for the building windows. I decided not to call it Round Oak as its not a model of the real place but Acorn Steel works had a nice ring to it as its smaller. Acorn was the name of the company magazine issued at Round Oak.
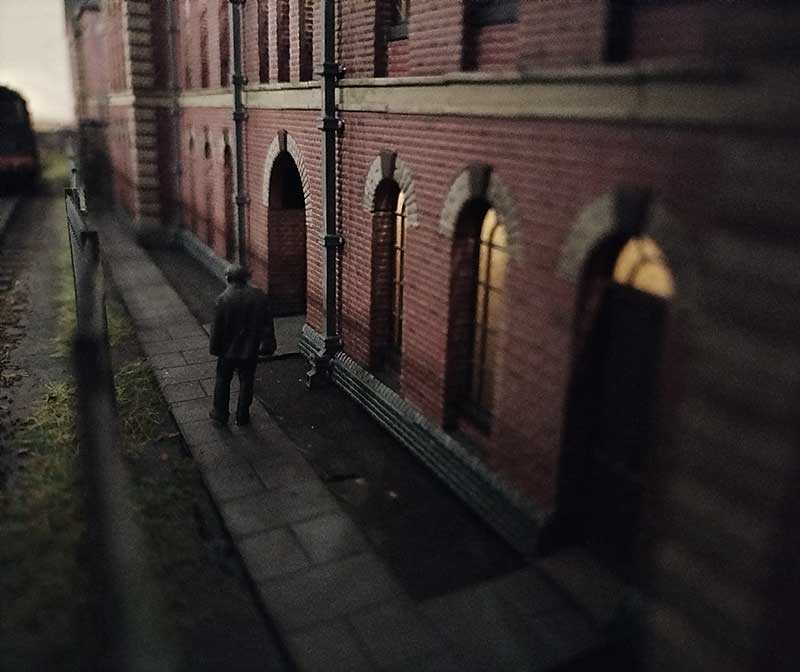
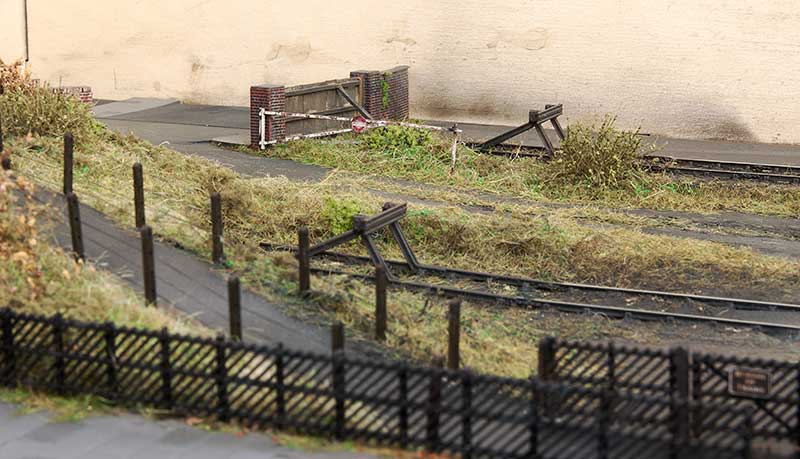
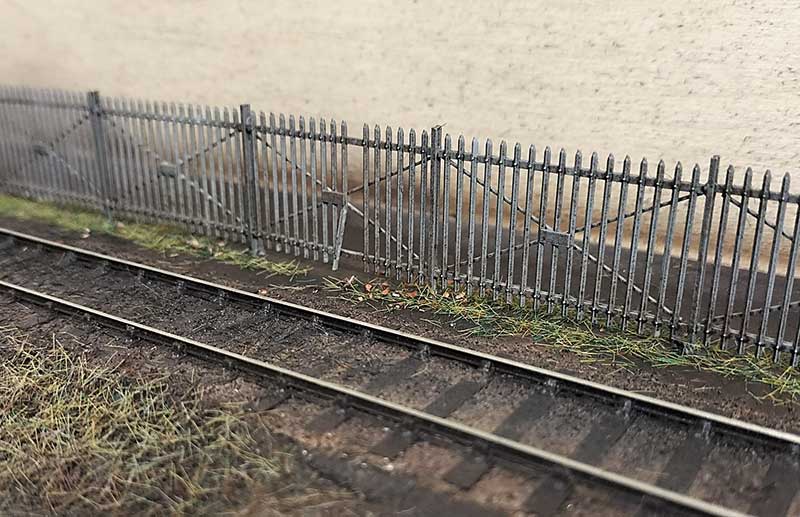 Moving along the fence we find an area where someone has made a hole! Perhaps it was kids trying to get in or perhaps it was a worker looking for a short cut to the station?
 The other end. I decided some remnants of an internal line into the works would be an Idea. For the surface behind i have tried out some AK interactive concrete. Theres areas of the building that will need to be concrete or stone however the texture is too heavy for 4mm scale. It would work as very, very rough concrete or as a base for rough ground perhaps. In this case I sanded it pretty much flat.
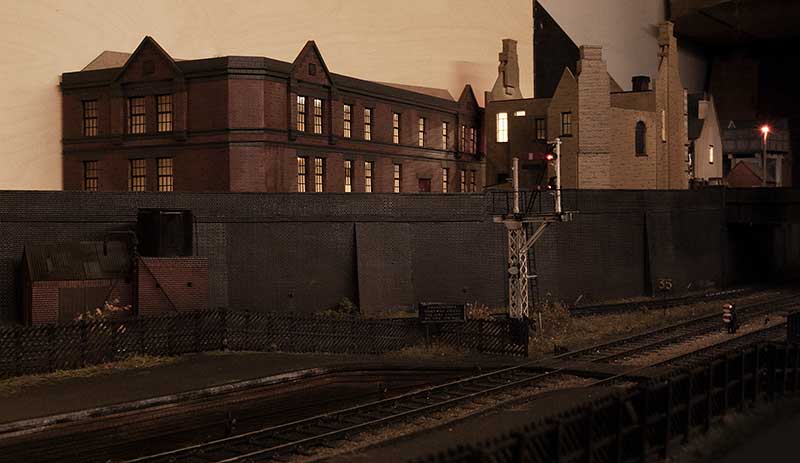
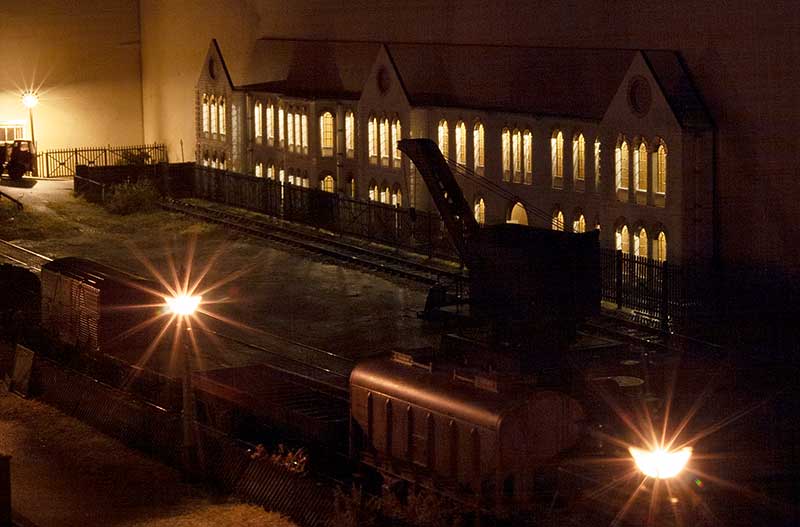 Finally I couldn’t resist a little test run of the buildings lighting.
From Little Acorns, Part 1
Construction has started on the latest building for Brettell Road. I’ve tried to incorporate some lessons learned from the previous efforts.
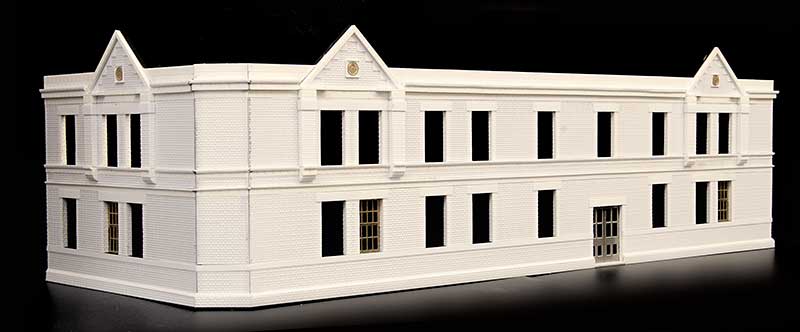
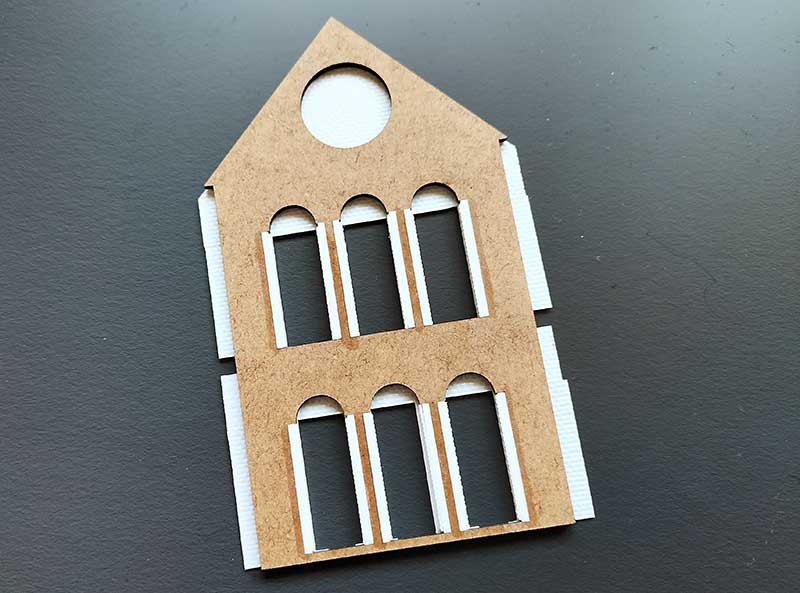 The main lesson being to do something more robust with the corners as these have been slightly problematic in the past. I decided to laser cut the main carcass and overlay it with plasticard. It may have been easier in the long run to laser cut everything but I like working with plasticard and scalpels and i didn’t fancy a huge session on my computer drawing bricks. As usual Tim kindly did the cutting for me. As you can see from the picture I’ve cut recesses in the corners and mounted some evergreen strip to give something solid for the overlays to stick too. It’s early days but it seems very solid so far.
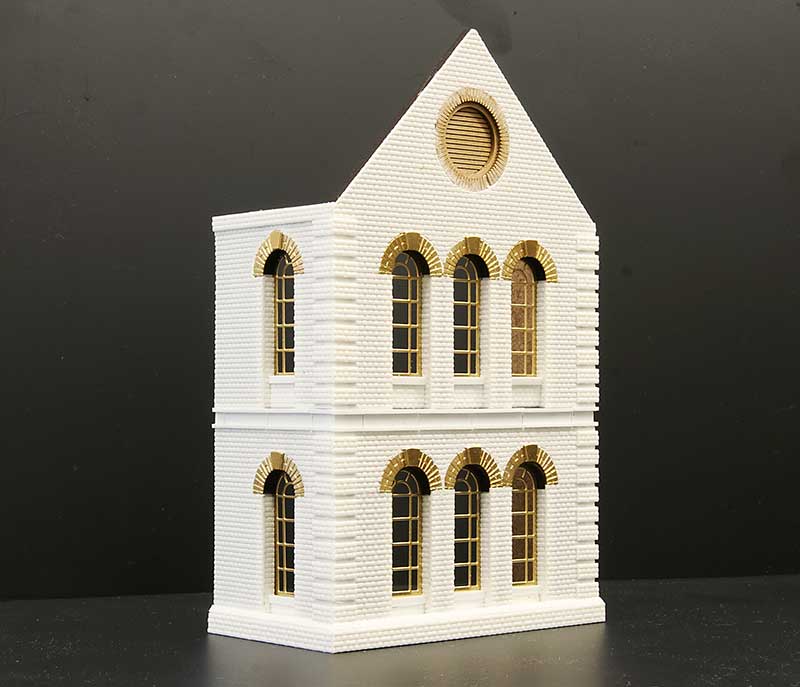 Turning the part around and moving on a bit, this is the front. Ive built this in a kind of modular way. I drew up the windows and arches and had them etched. There are 3 of these sections required for the building.
 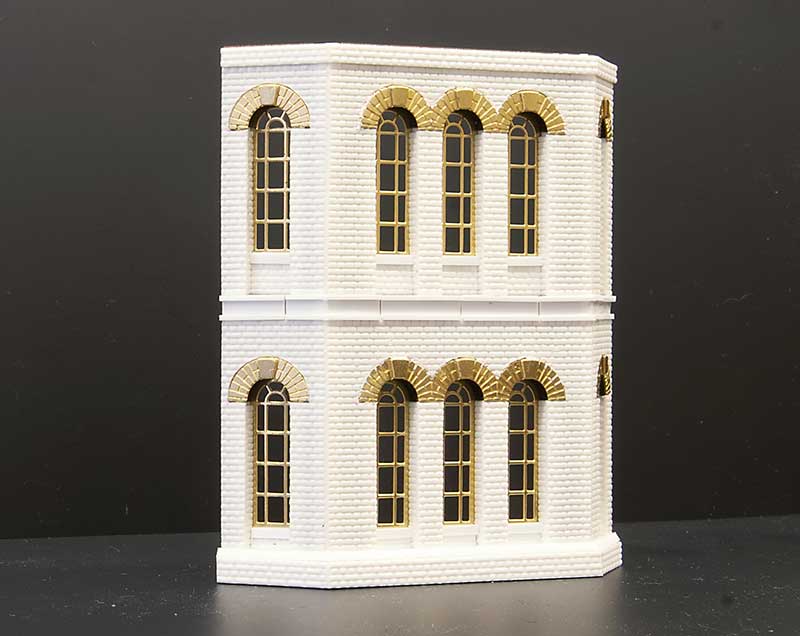 This is another section. Ive used the admin building from Round Oak as my inspiration but moved things around and adjusted them to suit. It’s an ‘inspired by’ model rather than an exact replica. This section was on a different face to the one I am modelling as it overlooked Dudley Road.
 To join these bits together are some flat wall sections. These are the smaller ones. Ive missed some bits off at this stage as I figured it would be easier to add them once its all together.
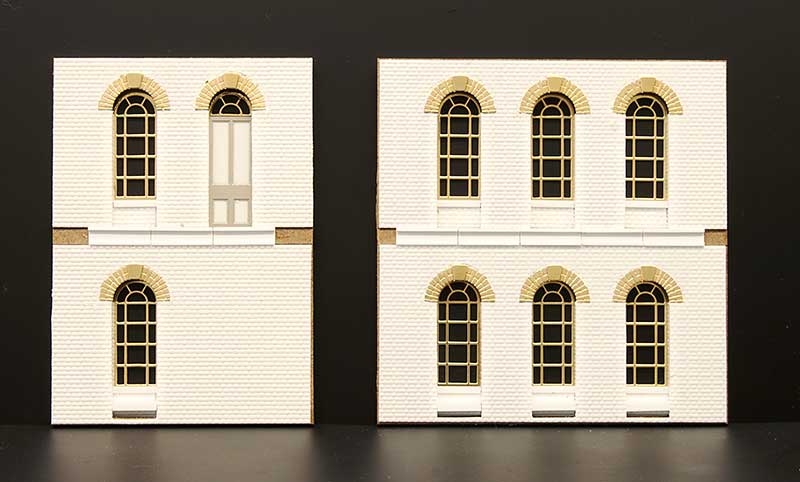
 And the larger one.
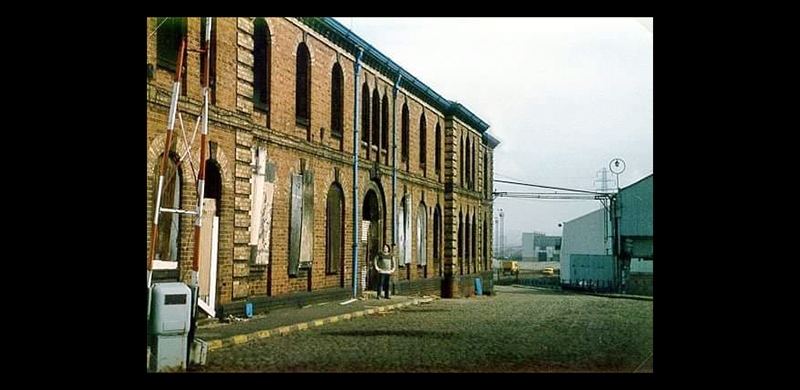 I didn’t manage to find a huge number of images of the real building. Theres one in Ned Williams book on Brierley hill and this one that my friend Frank Collins sent me. Sadly Frank passed away very recently and I missed showing him how I was getting on by only a month or so. I sincerely hope he would approve of my efforts. The model will be dedicated to him.
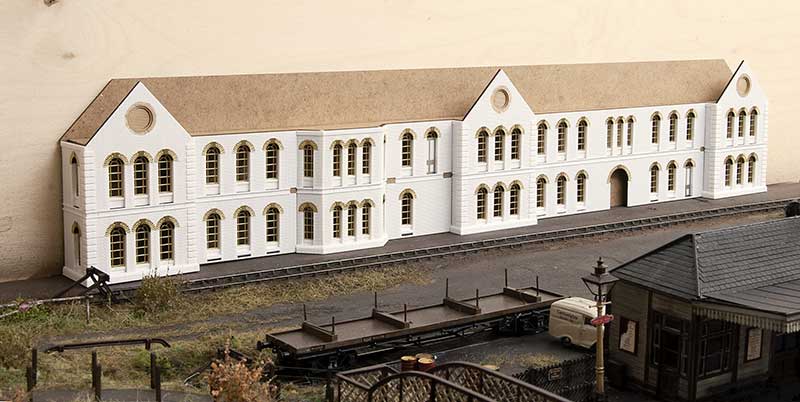 Progress so far roughly plonked in position.
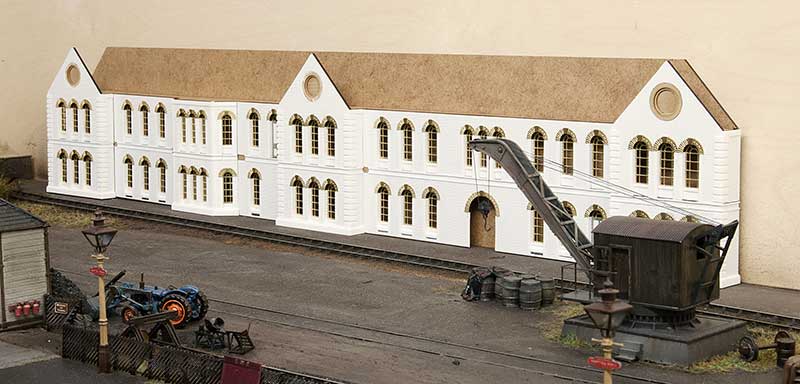 And from the other end. Much still to do!
Ticking more things off.
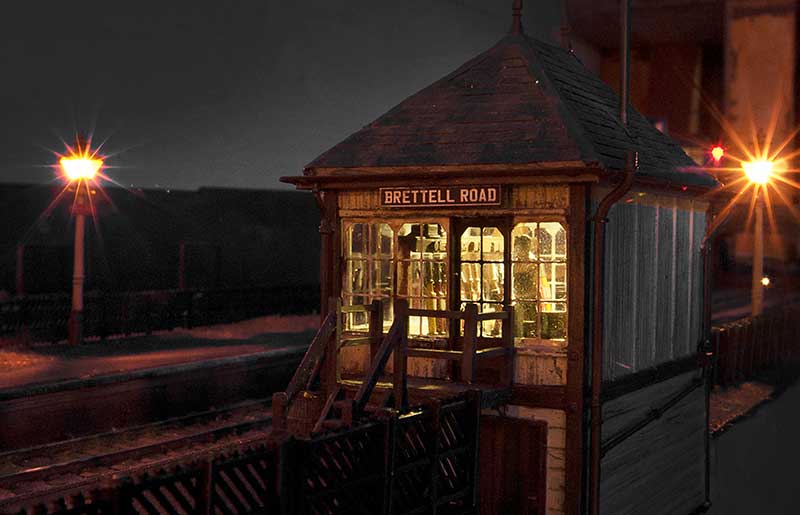
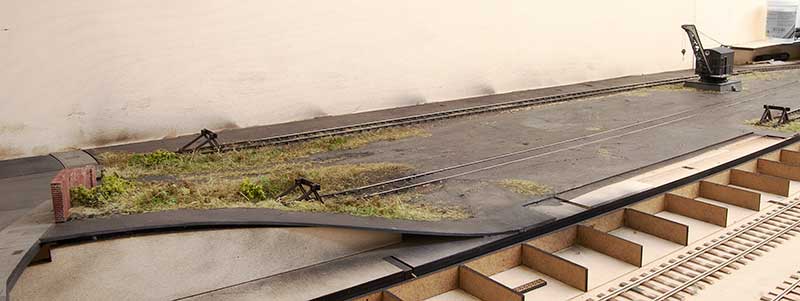
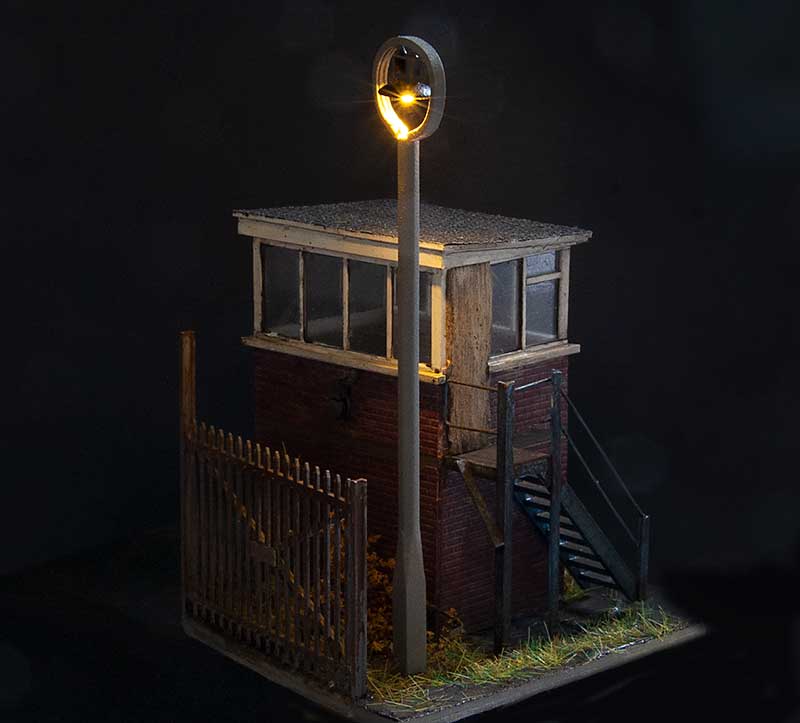 In order to ‘plant’ my abandoned crossing box I needed a base so opportunity was taken to do a micro diorama and take a piccie first. This is the side no one will ever see so it was worth recording for posterity.
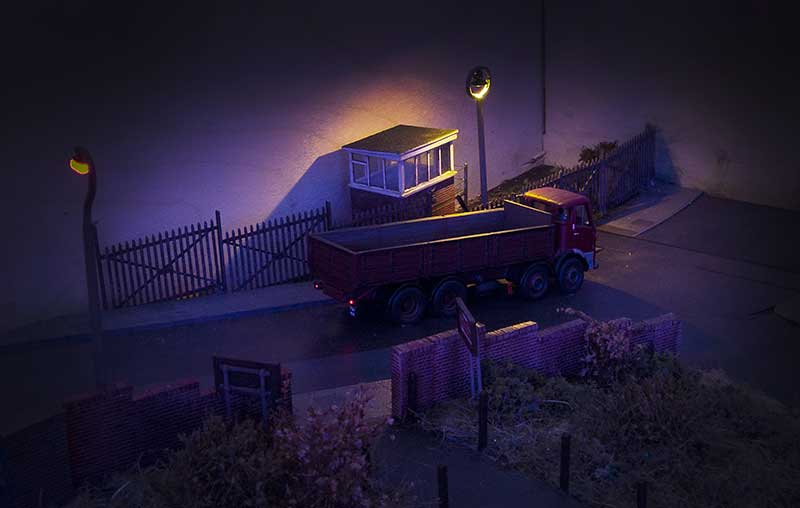
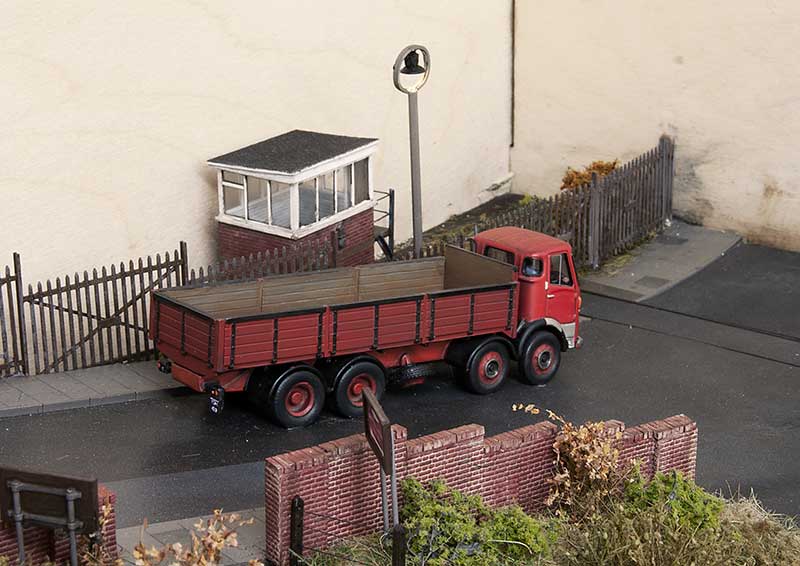 Here’s were it goes on the layout. One of those little out of the way areas that viewers will need to search out a little. The fence is Knightwing modified to resemble pictures of the real place in the late 50s. Below is the low light version.
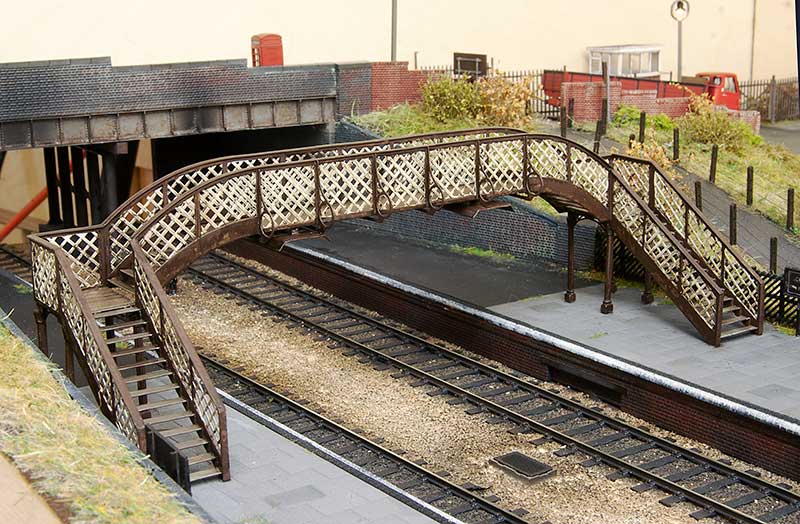 Ive also finished off my footbridge. In keeping with the rest of the layout (in fact in keeping with everything I do!) it’s modelled to look tired.
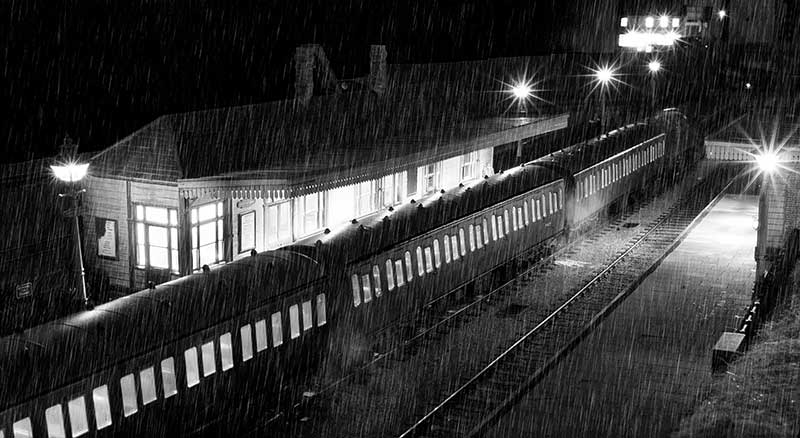
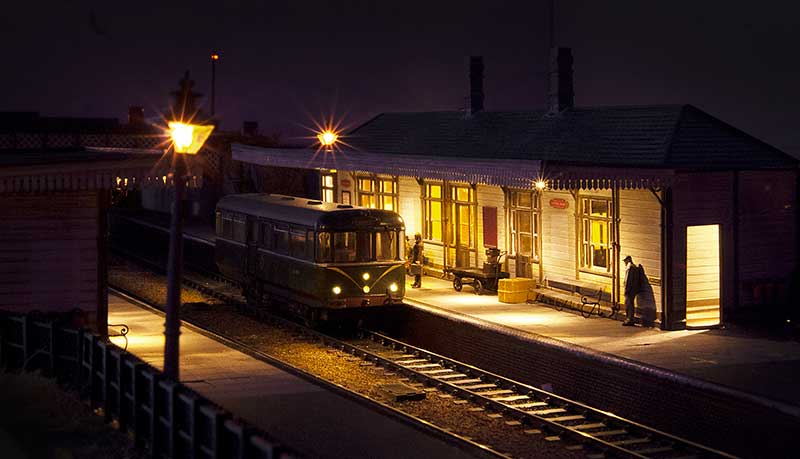 In an effort to keep the line open to passengers a 4 new fangled 4 wheel railbus was tried on the route. The experiment didn’t work out and the station would be closed a few weeks later.
 I’ve mentioned before my preference for long platforms and short trains. A BRCW type 2 and its 3 coaches demonstrates the effect I was after.
Little bits of abandonment
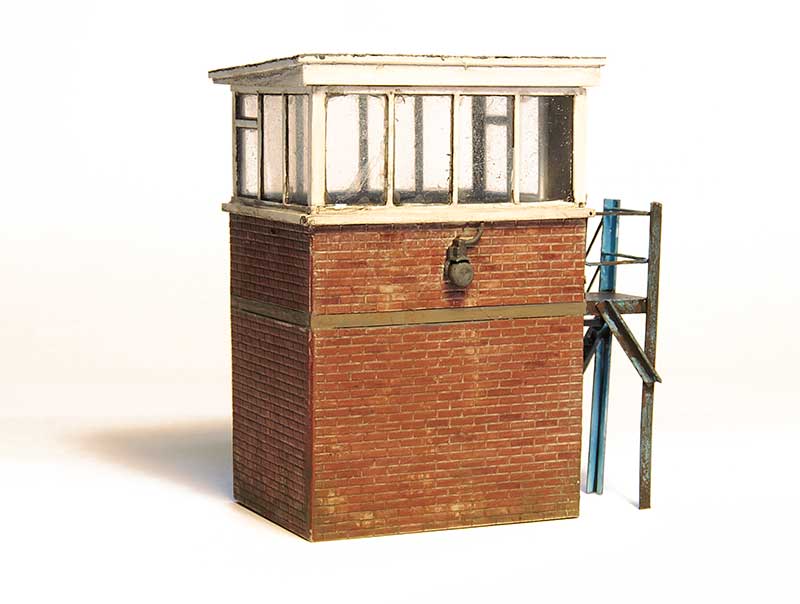 This is a little model of the crossing box from Level Street, modelled in its abandoned state. Ive taken a bit of artistic licence with this as the real building appeared after the layout is set and lasted into the early 1980s. Round oak did tend to move and rebuild things a lot though so a building that became redundant whilst still relatively new wouldn’t have been that unusual for the area. Plus as anyone who’s ever researched a real place will know, not everything at a location will always make a lot of sense. The model is scratch-built with the nifty alarm bell a 3d print kindly supplied by Richard of Mudmagnet Models.
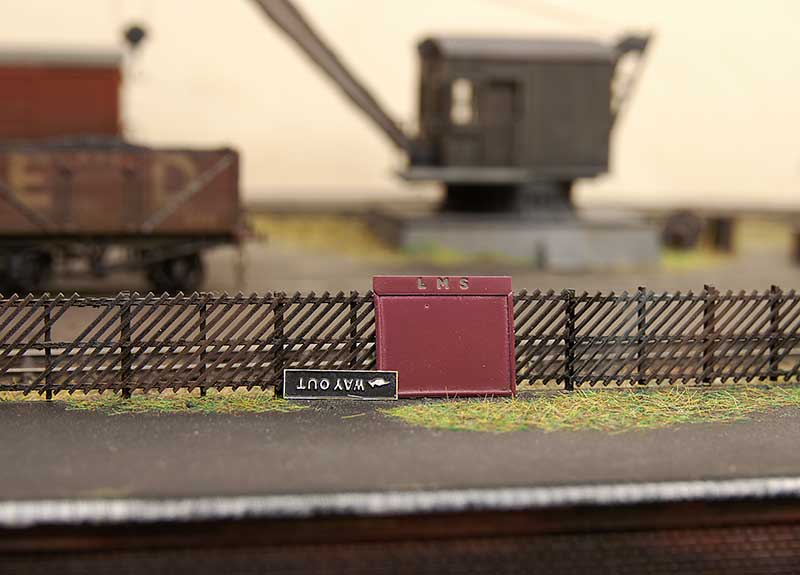 A few bits dumped agains the platform fence give just a hint that the station doesn’t have long left.
 When I rebuilt my loading gauge (a while ago now) I actually built another one at the same time. The frame is scratch-built from brass sections and the bow from Smiths. This actually serves a purpose as provided the layout is properly levelled this is the point where a free rolling wagon will start to move as the siding descends to the same level as the mainline.
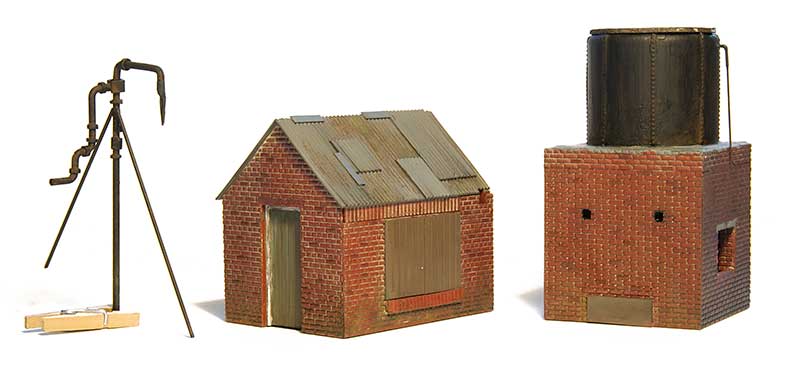 Elements of a rudimentary water tower. The prototype for this stood on the Earl of Dudley’s railway at the link between Oak Lane and Stallings Lane, Near to Himley’s No.8 pit. It survived until 1950. Its Heath Robinson look appealed to me.
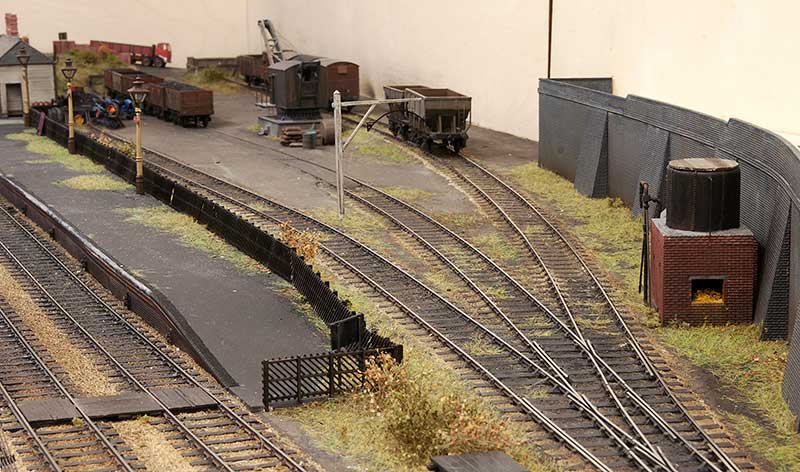
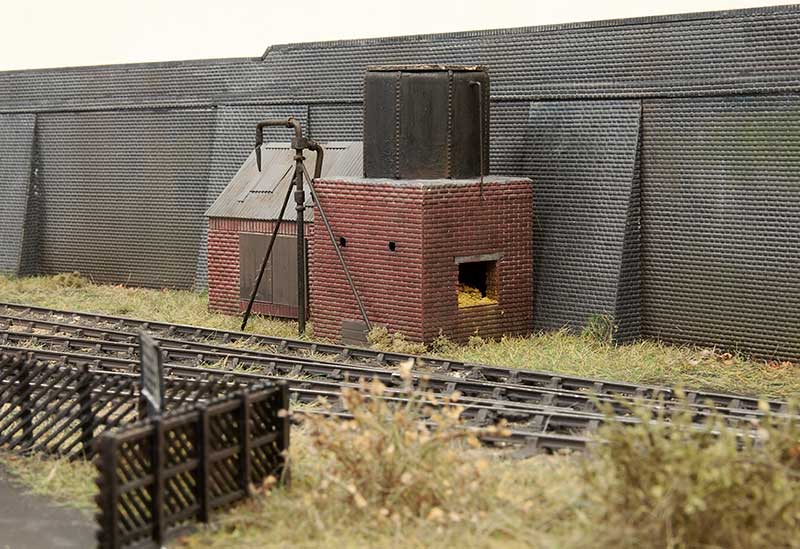 In position on the layout. Its days of servicing the EoD fleet of 0-4-0 saddle tanks are long gone.
Signs of life
 With the Stourbridge end of the layout looking half decent attention has turned to the Dudley end of the new boards or the middle of the layout. Theres a few things that jarred about this scene now that it’s more open. Before you couldn’t really see them. The pavement doesn’t flow properly and there are big gaps at the end of the bridge girder. Also the lower part wasn’t finished. When I designed the bridge I did have the foresight to include a half etch to allow the rivets on this side to be punched through. However when I built it i didn’t bother! Ive already pulled up the road.
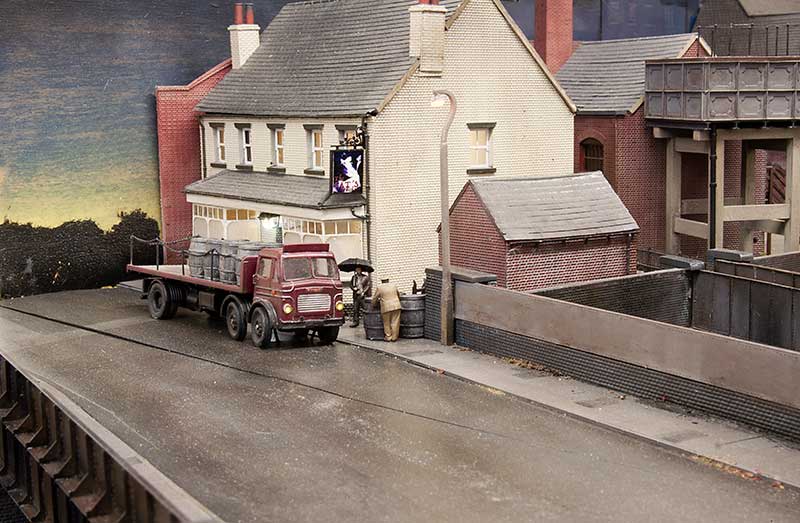 So the road and pavements have been redone. I made an overlay for the bridge from paper. The pub sign is from Model scenics and features our much missed cat Moo. The figures are from Modelu.
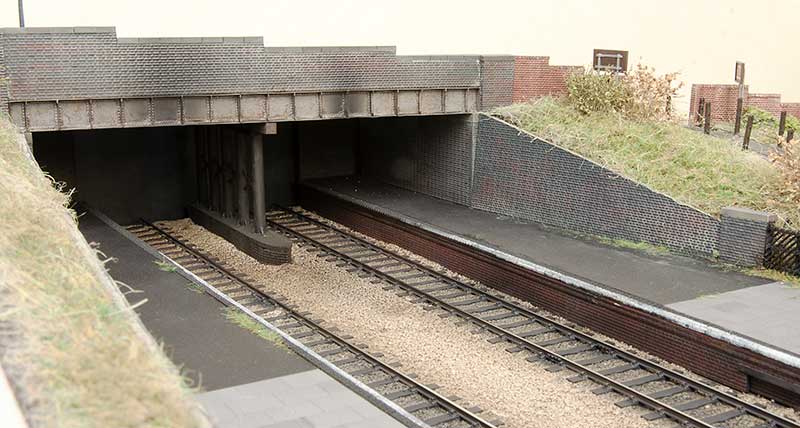
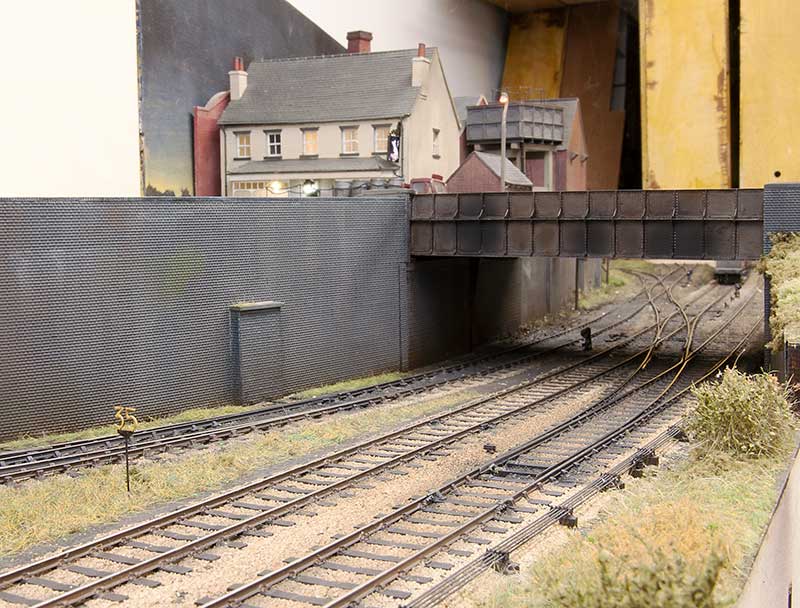 The bridge from track level. Ive added the retaining walls with some nifty top capping that Tim kindly cut for me.
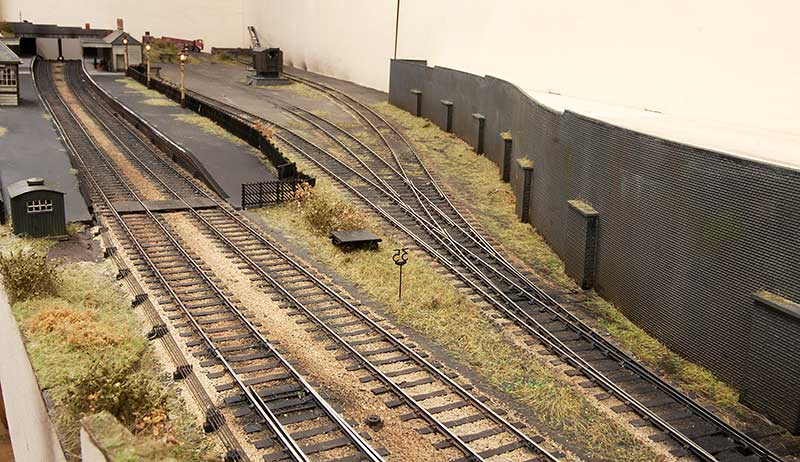
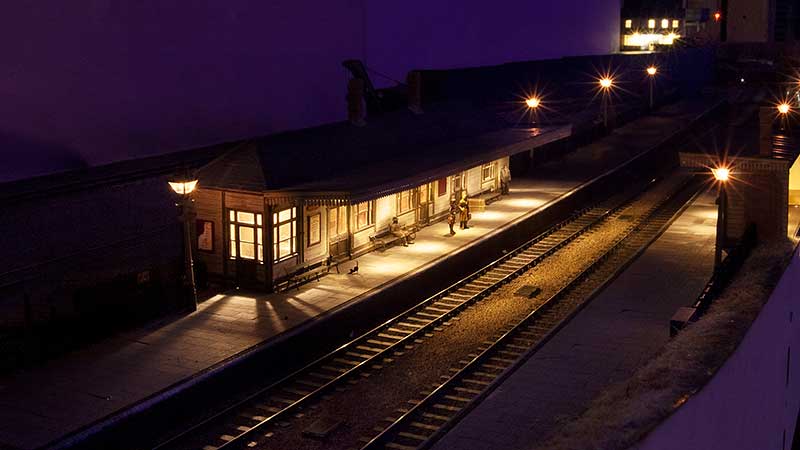
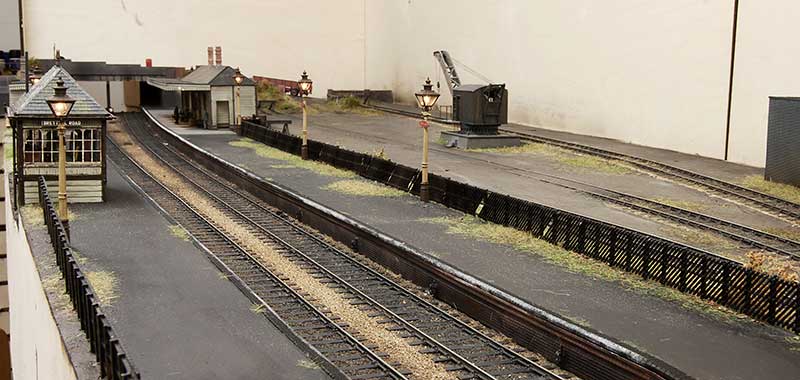 Turning around we see an overview of the somewhat neglected platforms.
 An overview of progress so far.
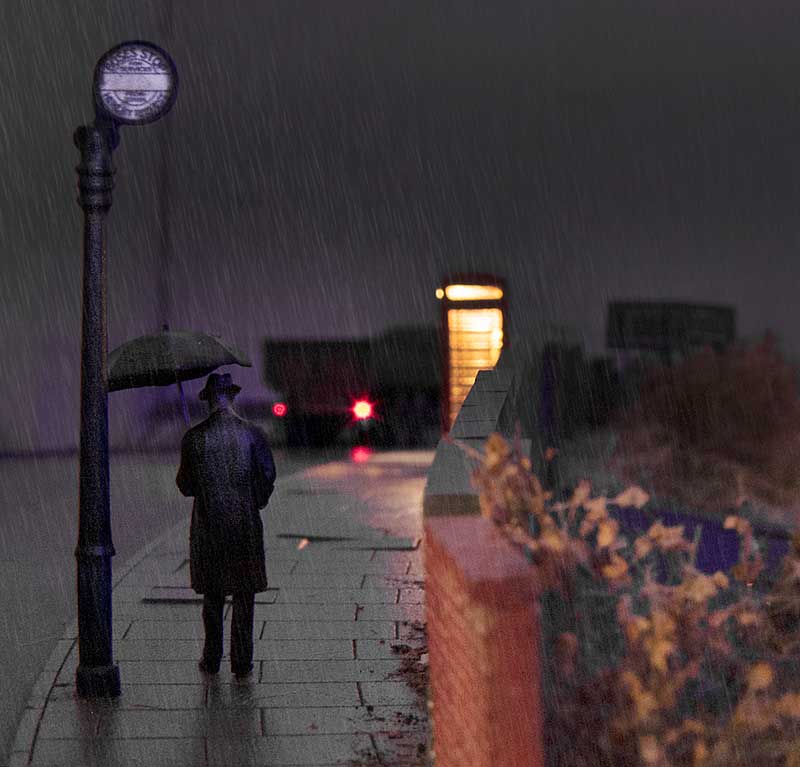
 Ive added a scattering of people from Modelu and Airfix. I thought the lady with the umbrella was particularly suitable. I still need to do more work to bed this end of the building in. Considering this is the rush hour theres not many people about.
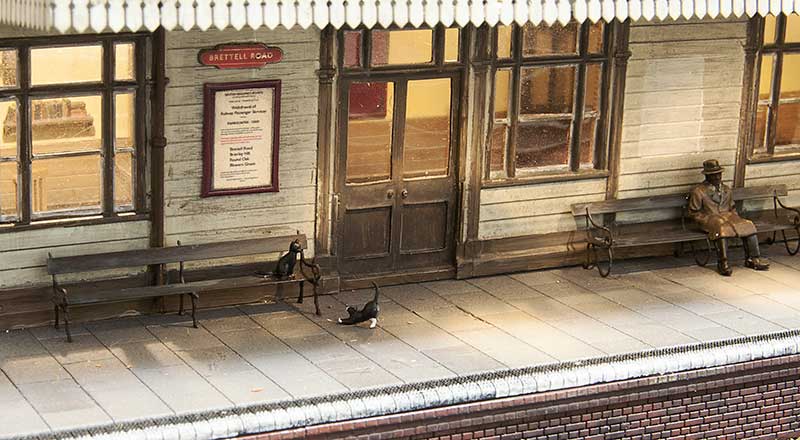 The station has 2 cats. The sensible one is Shadow while the mischievous one who wants to play is comet They are more interested in chasing each other than the local rat population!
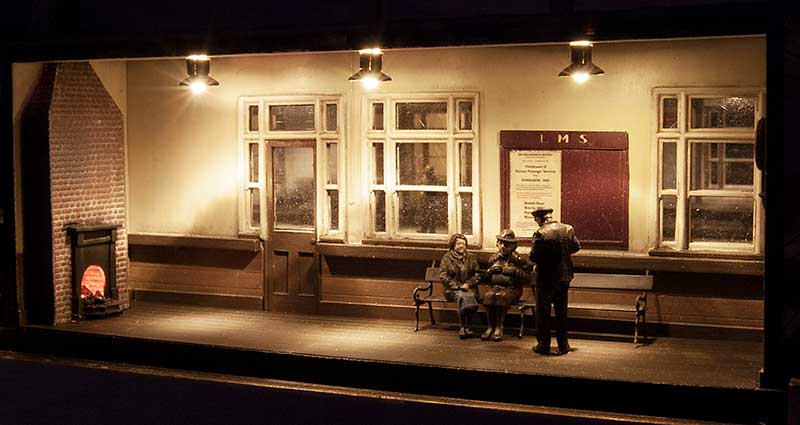 On the other platform a couple of elder ladies discuss the immanent closure of the station with the station master.
Agent 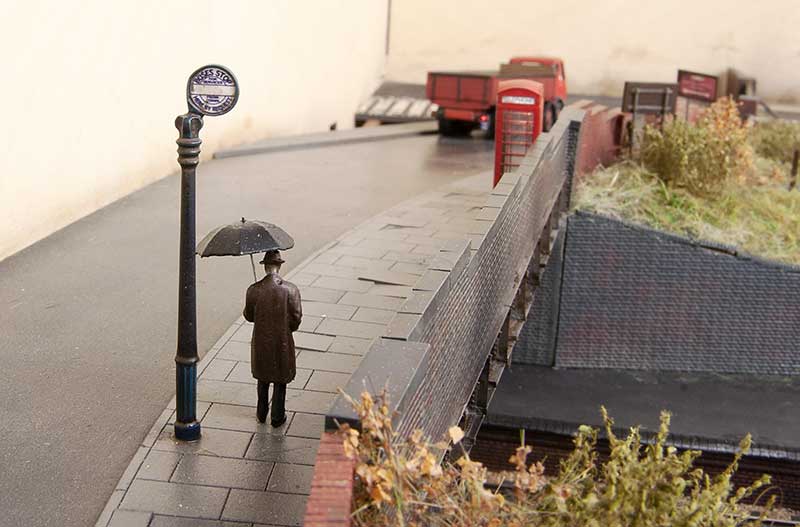 A gent waits for the bus. It’s late as usual!
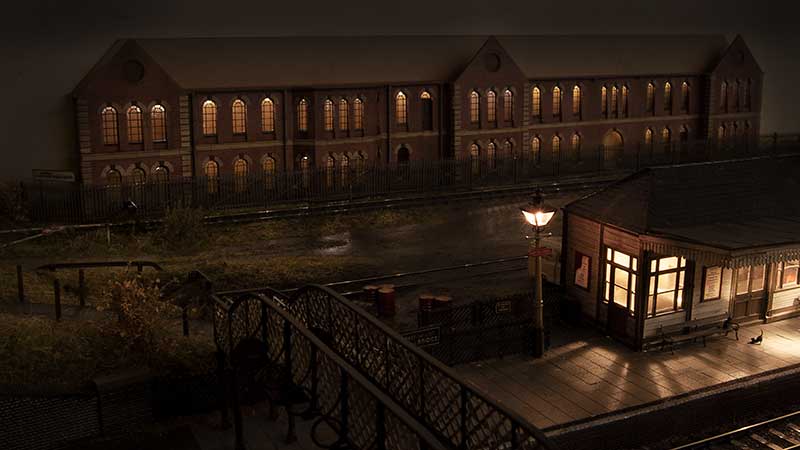
Now that the some of the lighting is in place a few dark shots.
Greenery and decoration.
I’ve reached the stage where all the significant greenery is pretty much done and I can move on to some titivating of parts of the layout.
 I’ve made a basic wooden fence to block off the line that crossed the road originally. The rudimentary gate (which looks like it hasn’t been actually used for years) is simply a few bits of 1x1mm brass soldered together.
 Proverbially walking up the road a little we come to the station signs. These are based on a photo I found somewhere. The fading on the signs themselves was actually an accident. The result of me handling the printout a little too early.
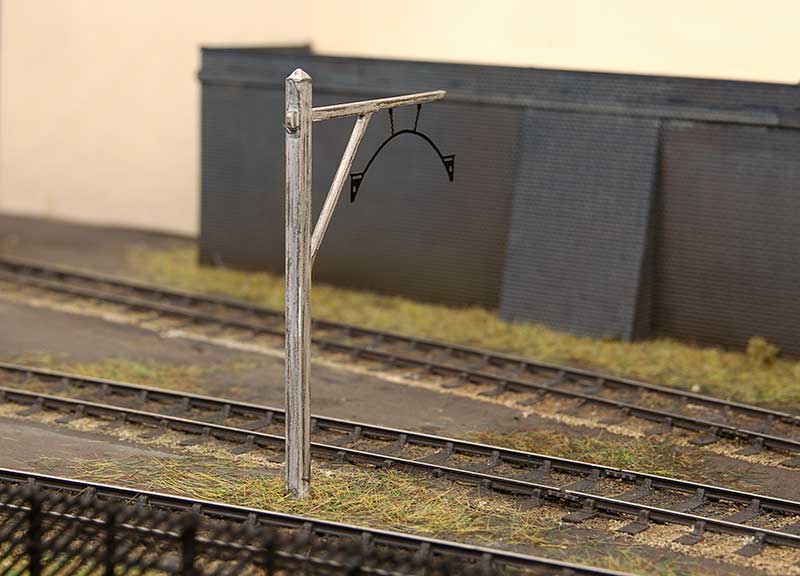
 Continuing our walk we come to this. What can be more of a model railway cliché than the good old bus on a bridge? Well since I am not going to be doing any buses for this layout I have gone for a midlands style bus stop instead. The main column was something I had in my spares box. The rain on the layout is always going to be going left to right as you look at it, so it makes sense that the autumn leaves and litter do the same. The top of the bridge is particularity known by the locals as being a bit blustery. (Theres actually a real location nearby known locally as ‘windy corner’)
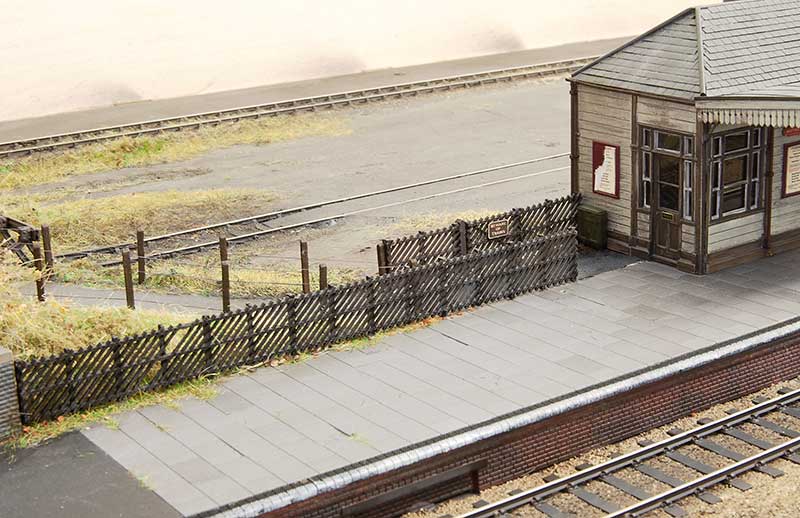 Peering over the bridge we see the lower end of the station footpath. The Midland style fencing and wire fencing posts both come from Scale Model Scenery as does the little beware of trains sign.
 Looking back at the bridge we just walked over. The girder is 2 of my previously designed etches combined together. I still need to add the top capping to the sloping walls yet.
 Overview looking towards Stourbridge. The 2 buildings are still just loosely placed at this stage.
 … and towards Dudley. You’ll have to use your imagination for the moment for fill in the bridge and the wall on the left.
 Old warning sign from Ambis Engineering
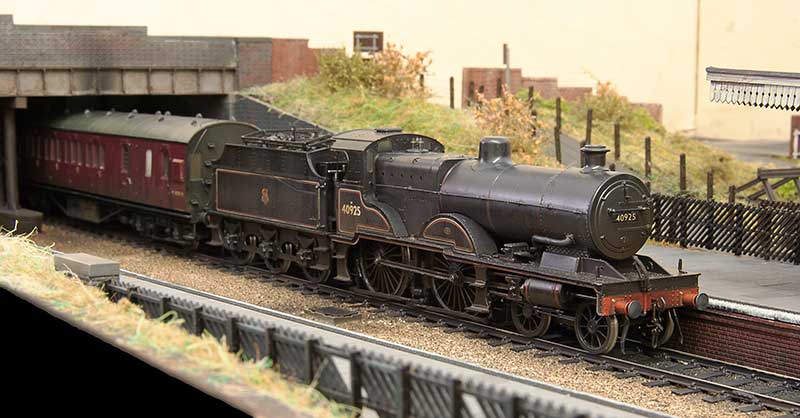 A train! Remember those?

The march of progress
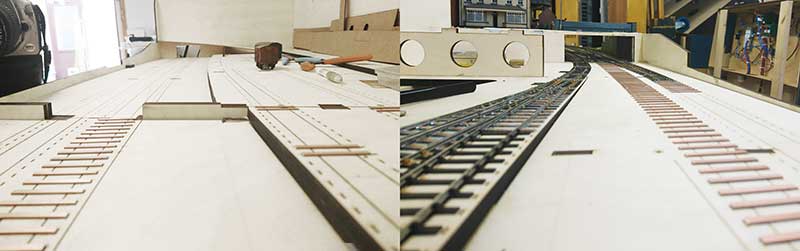
Ive been a bit busy. All the track is not ballasted and the first stage of weathering in complete. I have also put the platforms in.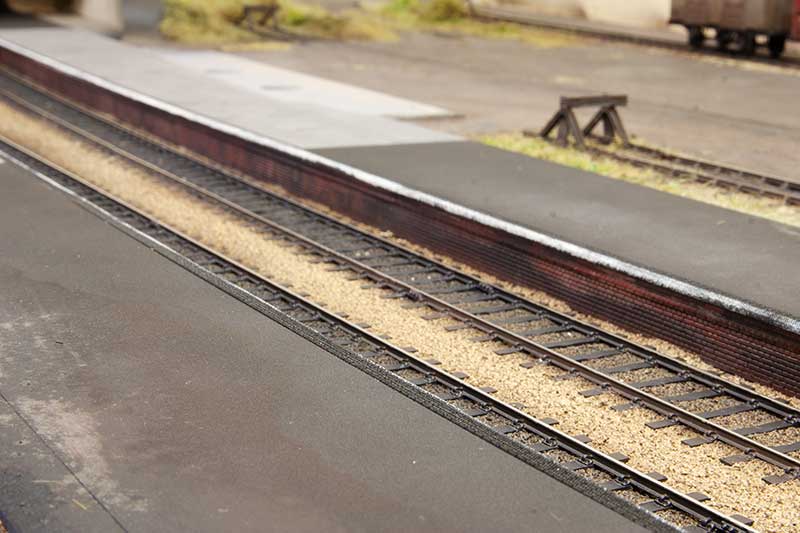 The sides and tops were cut when I was over at Tims. The brick platform edges are something Tim developed and they do look really smart.
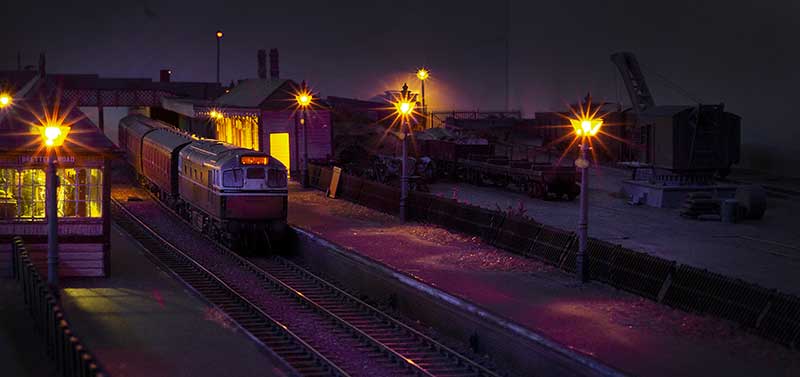
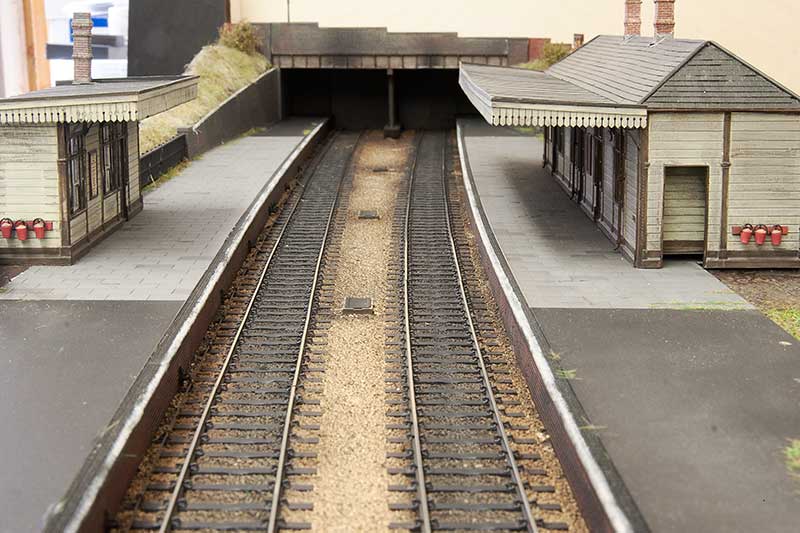
 Overview from the Stourbridge end.
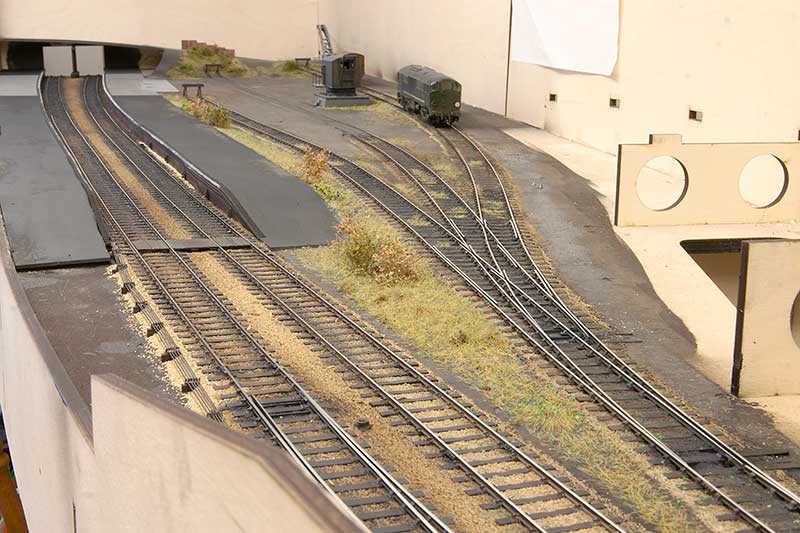 And from the Dudley end
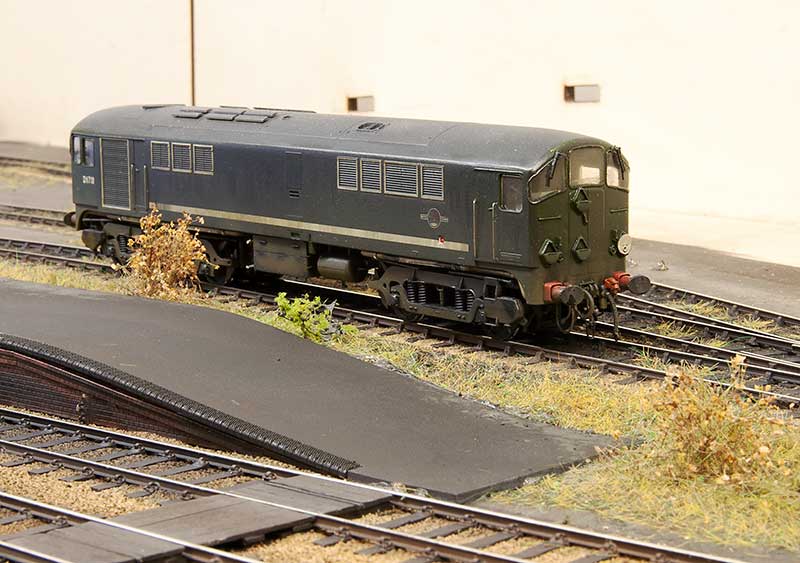 Co-Bo lurks in the weeds.
 Up until now i have resisted the urge to plonk the building in place but my resistance has now caved.
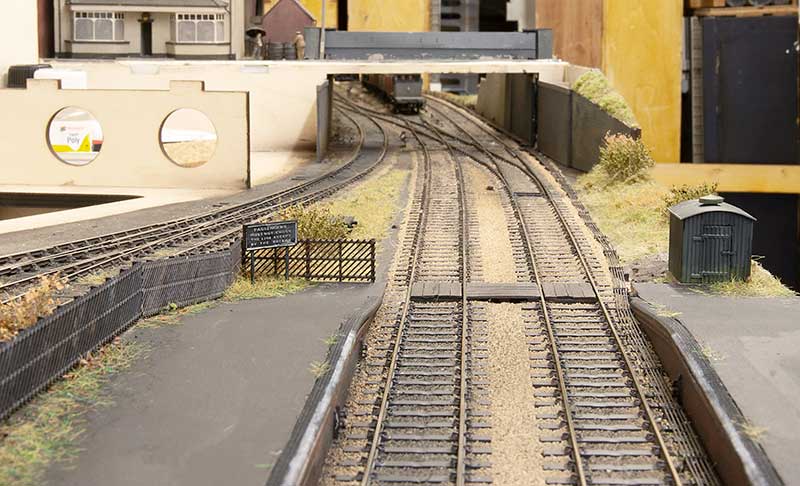
 View from under the bridge. This gives a good idea of the elevation changes in the yard. And before anyone says anything, doing the point rodding was probably a bit of a pointless exercise if I’m honest!
Bitsa post
This post kind of jumps around a little but lets start with a simple wagon as we’ve not had one of those for a while. 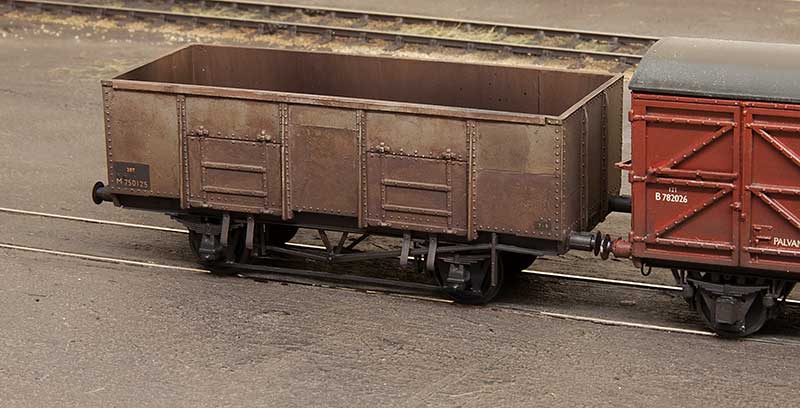 LMS diagram 1973 mineral wagon. These were a little odd as they had no end doors just side ones. The model was created by splicing 2 sections of the Dapol (ex Airfix) mineral wagon body together and mating the result with a Parkside 12 ft wheelbase chassis. The W-irons are Bill Bedford, door springs Rumney models and buffers from Accurascale.
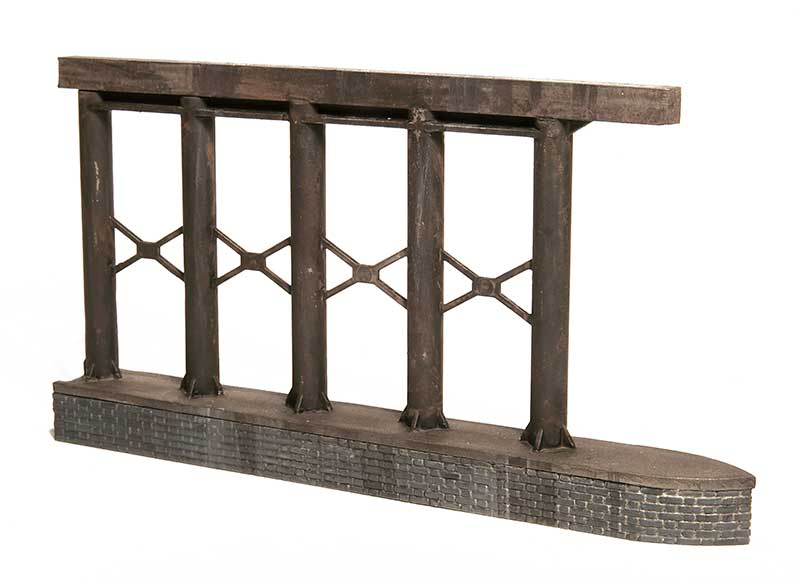 Both the real Brettell Lane and Round Oak stations had central supports under the bridges. As this will be right at the end of the layout, under a bridge and in the dark I didn’t feel I had to go mad as a silhouette is pretty much all thats needed. The main pillars are actually nothing more than a couple of Hornby gradient supports spliced together.
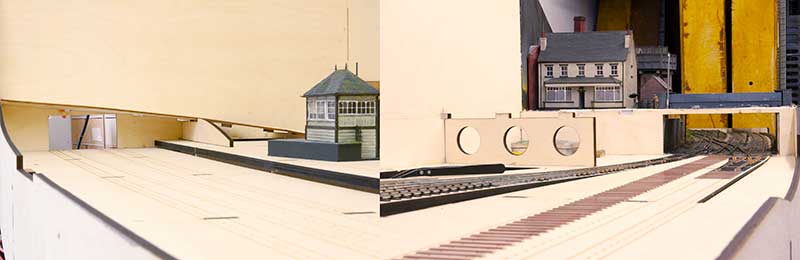
 I mentioned in a recent post that i needed to reverse my signal box so the steps are at the opposite end. Thats ticked off now and the results can be seen above. To see the original build click here.
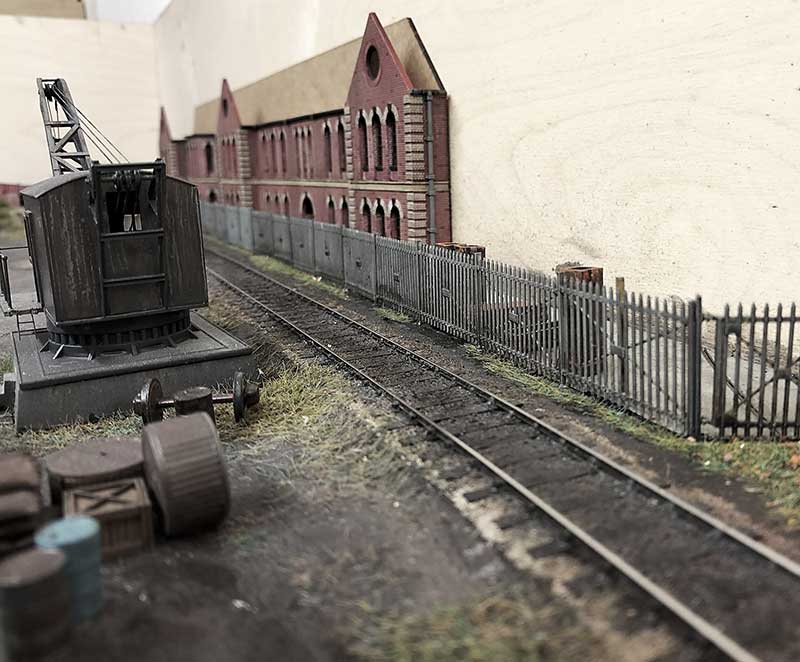
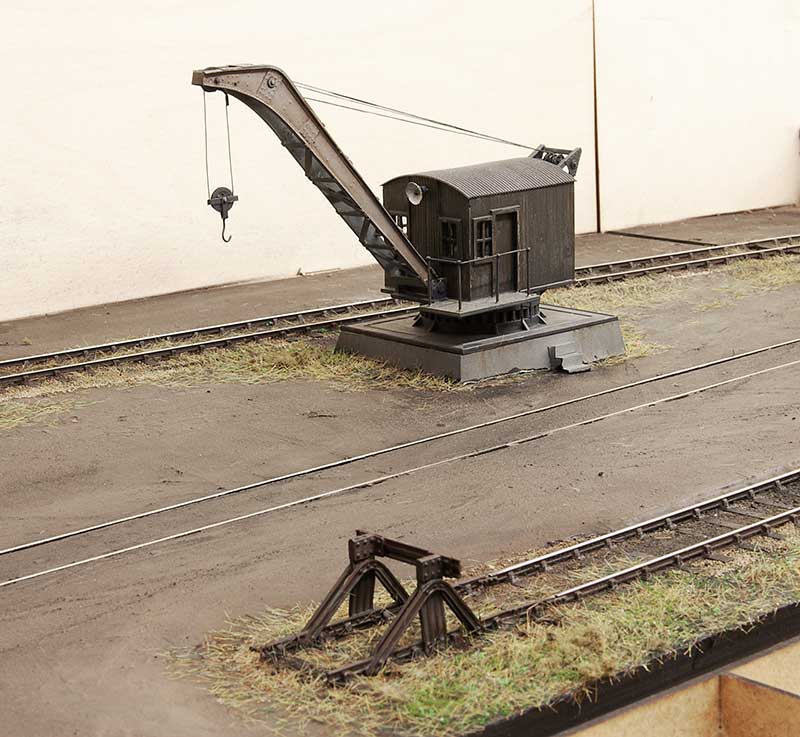 Moving back to the layout itself the much modified Airfix crane has now been planted and the yard track has been ballasted and suitably ‘neglected’.
 Overall view of the yard so far.
Tracks and tweaks.
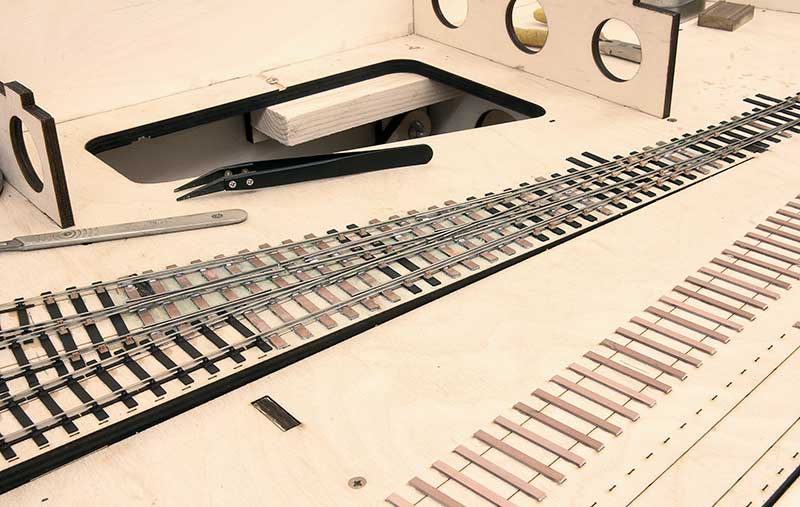
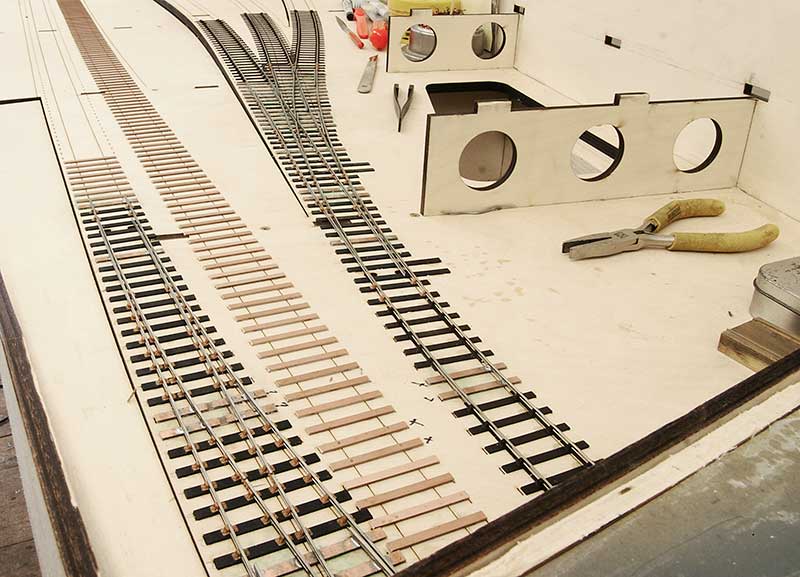
Been busy doing the fiddly bits of track for Brettell Road part 2.
 Ok, this is just a B9 on a slight curve, not exactly fiddly.
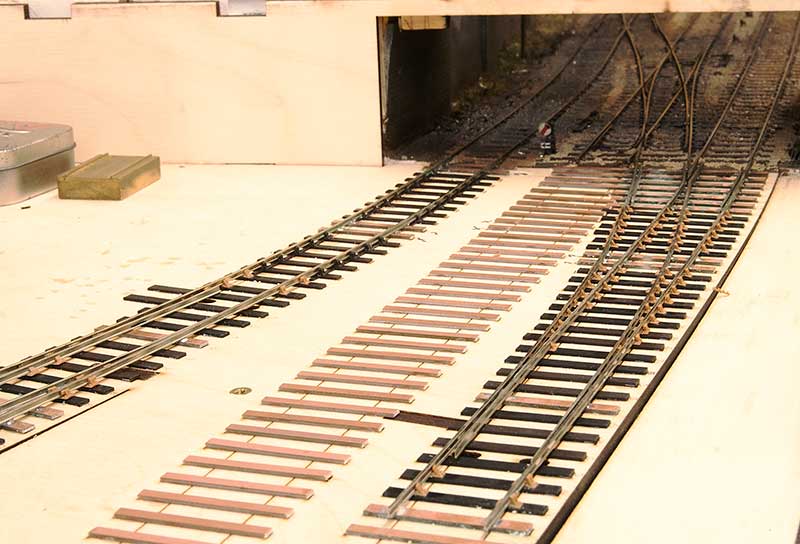
 This is a bit more entertaining though. Ive tried a slightly different approach from my usual norm by using more copper clad and building more in situ than I usually do. I normally build the crossing assembly away from the layout but decided this time to only assemble the vees themselves remotely. I think its a bit quicker and allows a little more wiggle room doing it this way.
 The view from the bridge.
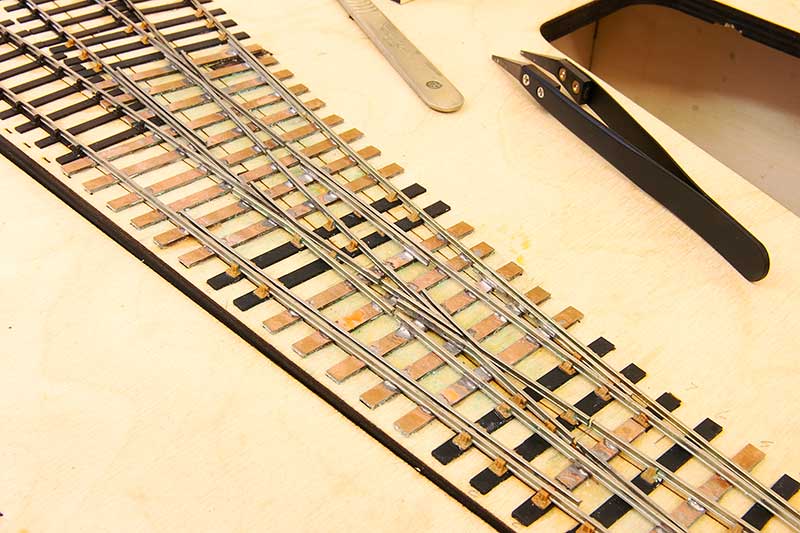
 No matter how designed you think something is theres always some tweaks needed when you see the thing in the flesh. I never noticed how the 2 vees had ended up virtually on top of each other.
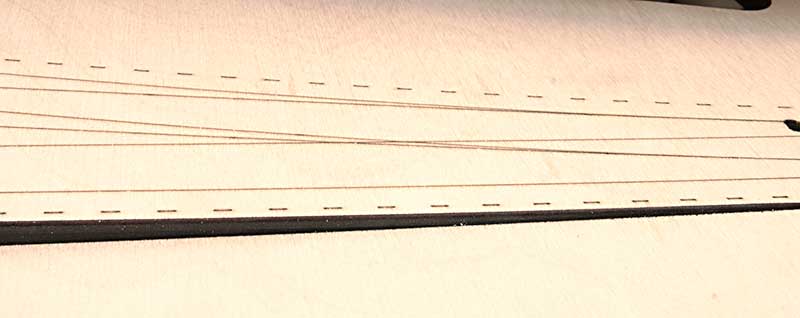
 You can see here how the middle road has been realigned. The original alignment showing through under the sleepers.
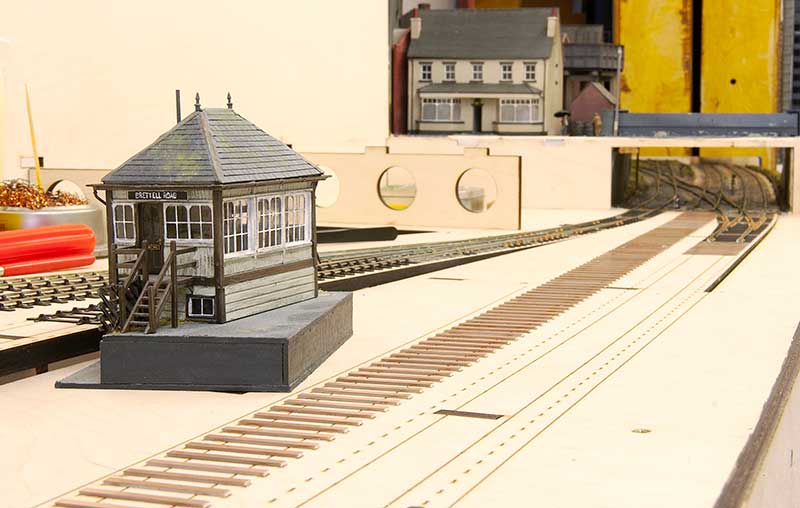 Another tweak is the position of the signal box. I don’t think I fully took into account the curve and the sighting lines are worse than I thought they would be where I put it originally.
By moving it to to the other platform and along to the left a bit the sighting lines are much better.
So the signal box will go here instead. I will need to move the steps to the near end and I plan to fit deeper windows so that it more like a type 3 box.
A somewhat unfocused post.

Something that always bugged me about my Heljan class 27 was the somewhat odd buffers. A long time ago i got a set of replacements from Sutton Loco Works and its just one of those things I never quite got around to. Well now that little job can come off the list.

Finished the roof of my station building – just need a layout to plant it on!

The gutters are a recent introduction from Modelu. I found they don’t like superglue at all but stick very nicely with liquid Poly (in this case Tamiya extra thin).

Popped back to my Kirtley to pick up a few things that irked. The loco to tender gap has been tightened up a bit and the rain cover tidied.

Crew from Modelu

Bit more off a proper project this one. A clasp braked 16 ton mineral from a Parkside kit on a Rumney Models underframe. The only down side to Justin’s stuff is it looks better not painted! A few pics below for history.


Another ‘tweaks’ post
Bit of a random post this time but I have been revisiting a few things. Be warned though these are all really subtle and if I didn’t point them out I suspect no one would ever know.

Starting with the safety valves on my prairie. As supplied it was a pretty flat dish with 4 blobs to represent the valves. A bit of drilling and some wire gives something a little better.

I’ve also gone back (again) to my Dapol railcar for another little tweak.

As its not all that obvious I have fiddled with the bogies a little. Some 3x4mm triangles and some microstrip was used to change the sideframe shape to something more accurate. I also got a spare set of sideframes and cutting the springs and axle boxes of the new ones, filing down the old ones and sticking them over the top had given me more relief.
Sometimes its nice to look back at where we started to see how far we have come.


While i was in a railcar kinda mood this is my detailed Lima one. I haven’t done anything to it, it just tends to avoid the camera for some reason.

Austerity hides at the headshunt. Again no tweaks just a piccie.

Now this is properly subtle. I have revisited the layout with some Tamiya smoke and AK wet effects to see if I could increase the wet look a little. The smoke provides the darkening effect of the rain.

It a little easier to see on the light walls of the pub.

The thing is I know its darker because i knew what it was like before. In order to give fresh eyes something to compare it with I needed a few areas of contrast.

By the warehouse i can leave the area under the canopy dry to give the contrast I was looking for.

and at the other end the areas shaded from the rain by the bridges. Its important to make sure the rain falls in the same direction. So the buildings don’t have smoke applied to the sheltered walls. Its the area above where I feel the effect has come out best.
A little something I’ve been dipping into.
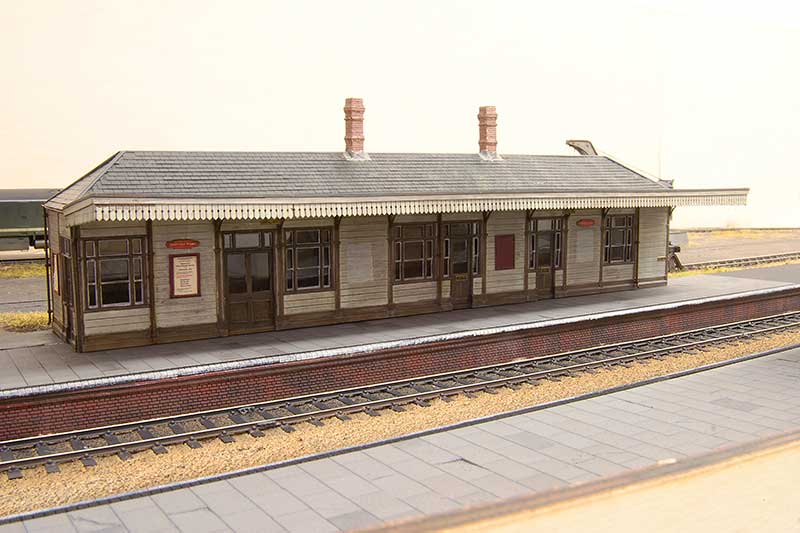
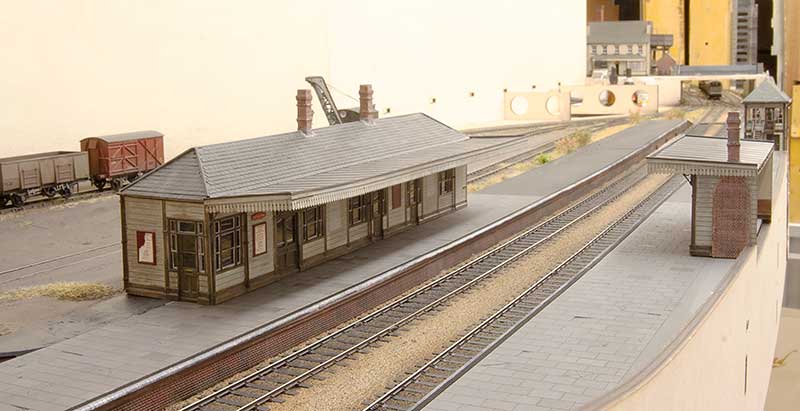
One little project I have been dipping in and out of now and then has been the station buildings for part 2 of Brettell Road.

This is the smaller building. The real buildings at Brettell Lane were wooden but of a GWR origin. As Brettell road is more midland I used the Ratio (previously Parkside) LNWR station panels. These or similar were used in the Birmingham area so that was near enough. The canopy valence and supports are from London road models and the poster boards from N brass. The chimney is from Unit models.

The side in the first picture faces away from the public so rather than have a blank wall I decided to give the viewers a sense of being inside the building. (it is supposed to be raining remember, who wants to stand outside?)

The main building is the same but bigger. The above image gives a rough feel of the look im after. I actually shot it like this because I haven’t done the roof yet!

I have mentioned in a previous post the idea of letting the layout have little bit of a life of its own. Originally i was going to use the name Brettell Grove not Brettell Road so why not an old station nameboard with the original name?
Bashing Buildings
When it comes to building I admit I tend to just get on and scratchbuild them. Part of this is due to ignorance of whats actually out there but recently I picked up a couple of Wills kits and have had a go at these instead.

First up is the kit for a lamp store. You actually get 2 in the kit and these are for the slightly different GWR design but can be adapted to something more ‘midland’ pretty easily by shortening the sides to form a 6ft square structure. I cut out the door and remounted it flush as well as replacing the roof with thinner plasticard. On the other end I added a few extra window bars (see below).


The other kit was for the ‘station garage’ which i have chopped about to give a industrial looking wooden building. The roof again is plasticard (the wills stuff is quite thick) and the vents are from unit models.
Local Flavour
This post can best be described as a taste of local flavour if not the full meal itself.

Anyone familiar with railways in the Stourbridge area will be aware of the Parry People Movers that operate between Stourbridge Junction and Stourbridge Town. Little 4 wheeled railbuses that spend their days shuffling along the UK’s shortest passenger branch line. The line itself is still jointed track meaning the ride is somewhat best described as lively! While famous now for these little vehicles Stourbridge didn’t really embrace the railbus idea the first time around, The line begin operated by autotrains and GWR design railcars at the time railbuses were being tried elsewhere.

However as Brettell Road is a loose interpretation I have gotten hold of a Heljan one as a nod to the little people movers. This was always going to be a nice to have rather than a need so having kept my eye on eBay for a cheap one, just on the off chance, this AC version popped up as a non runner with a dodgy motor for less than half the price the runners were going for.

The motor was replaced with a small Mashima I already had. One of the drive shafts was bent out of shape too but as these little models are very heavy for their size I binned that and now its just powered on one axle. For what it needs to do that seems absolutely fine.

I’ve fitted a Zimo MX634D decoder in the space in the roof linked to a TCS KA2 stay alive hidden behind the door and weathered it, The wheels are Branchlines 3ft using the original gears and bushes. You do need to grind a little bit of the chassis away to get them to fit. A couple of passengers and its good to go.


Same idea – different generations!

Another bit of local flavour. The yard crane at the real Brettell Lane was a bit of a chunky affair. In line with my upcoming demo at Scaleforum on making the most out of older models, I’ve come up with this representation using the Airfix dockside crane as a start point. The jib is scratchbuilt from plasticard. I’ve only seen a few distant pictures of the real thing so this is very much a loose interpretation.
Getting the most from older models.
In September I will be doing a demo at Scaleforum entitled getting the most from older models. Regular readers will know I have a bit of a thing for starting with old models that many will have long ago consigned to the bin. To this end I thought id look at a couple of old building kits too. Namely Airfix.

The Airfix Signal box is based on the one at Oakham which is a Midland Railway type 2a box from the early 1900’s I liked the look of the platform mounted version at Kings Heath (which is a type 3a) so set to work
The kit as supplied is too wide. I used some etched windows from Phoenix models and reduced the ends to fit. I binned the roof and knocked up a new end platform from microstrip. I wanted to use this model to try out a few new (to me) painting ideas.
First step was to paint it in an aged wood colour. The wood effect is pretty easy and quick if you work more like a painter and less like a modeller

I use these 4 Revell enamel colours as they are nice and matt. They are numbers 47 (mouse grey), 88 (ochre brown) , 84 (leather brown) and 9 (anthracite grey). The actual colours aren’t that critical. I use a dunk and dip technique and work on a base of Halfords grey primer. I dunk the brush into the mouse grey and ochre brown and lightly dip the tip into the leather and anthracite. All at the same time so that the brush is loaded with layers of colours. Then is just a simple case of drawing the brush across the model and letting the colours mix themselves. You don’t want them to mix too well so try and do one stroke per plank and work in the direction of the wood. The trick is to let the brush do the random work for you and not to fight it too much. My end result was a smidge dark so when dry, i drybrushed more mouse grey lightly over the model.

This is what ended up with. I then gave it a couple of coats of matt varnish.

This is the bit that’s new to me. Ranger distress paints. The large scale guys have been using these for a while with good results but the method for smaller scales seems a bit different. The pain is intended to be dabbed on quite think and left so that it starts to crackle and flake on it own. For our scale i found it better to brush it on on 2 coats. This doesn’t do any ‘magic though so the next stage is with a fine sanding stick to give it a little help. Again working in the direction of the wood.

Here’s the result. Distressed but not weathered. Another coat of Matt varnish and then back to enamels, used this time as a thin wash. I added an interior from Ratio and a signaller from Modelu. The finished result can be seen below


Return to the back scenes
I’ll admit I wasn’t planning on the back scene post being a 2 parter but thanks to some helpful feedback I’ve had another look at what I did before. Changes are to add detail to the windows and make them more yellow/darker. Ive taken some magenta out of the prints and added some blur to various buildings to knock them back a little and give a better sense of depth. Ive also added a few extra details. Ive also left the roofs gloss while the rest of the prints are matt in an attempt to emphasise the wet effect I’m after. You can judge for yourselves the results below. 


Tweaks
Afraid there’s nothing new in this post, just tweaks of things already seen.  Ok so you can’t see this one really but in testing the parcels stock shown last time, this point wasn’t as reliable as I liked. I have a view that all stock should go everywhere and while the parcels stuff probably wont run over this point at shows. it did show up the problem. To be honest its always been not quite right so having tracked down the problem to the nearest point blade the old one was removed and a new one filed up and put in its place. The old one and a few dead chairs can be seen in the ballast and I thought why not let the layout have a bit of its own history, so they are now firmly glued there.
 Looking the other way nothing more than a bit of oily track. After the initial coats of track grime and gunmetal I treated it with AK interactive wet effect and engine oil.
  At the recent Derby Show (where we were showing Moor Street) my friend and fellow layout operator Paul pointed out that railcar 14 had lamp irons on the nose. I dunno how I missed this. So given that I hadn’t sorted the horns either (should be 4 not 2) I have set to work. I also found that there were cab end handrails and Dapol had missed the double door handrails as well.
  Another small tweak that I’ve been meaning to do is to sort out the cab side windows on the class 20. The original Bachmann ones slid open and like most RTR gimmicks were a bit naff. So using a spare pair of window frames from Extreme Etches that I had lying around I’ve fixed this little bug bear.
  My Derby lightweight was always a bit of a rush job for Scaleforum. The gap between the vehicles being much too big was the main eyesore!
  Closed up and a masokits gangway fitted.
  Another problem was that the on board lights lit up the cab. Some simple blinds from black paper resolved that.
  Moving on to the warehouse. I’ve finished the guttering and added a low handrail along the top of the wall. Although Brettell Road is set well before the health and safety culture we have now there was still a reasonable chance of a driver falling off the wall!
  A bit of the gutter has fallen off at some point. So some water stains and higher weeds below are the results.
Tweaking the lighting and yet more rain.
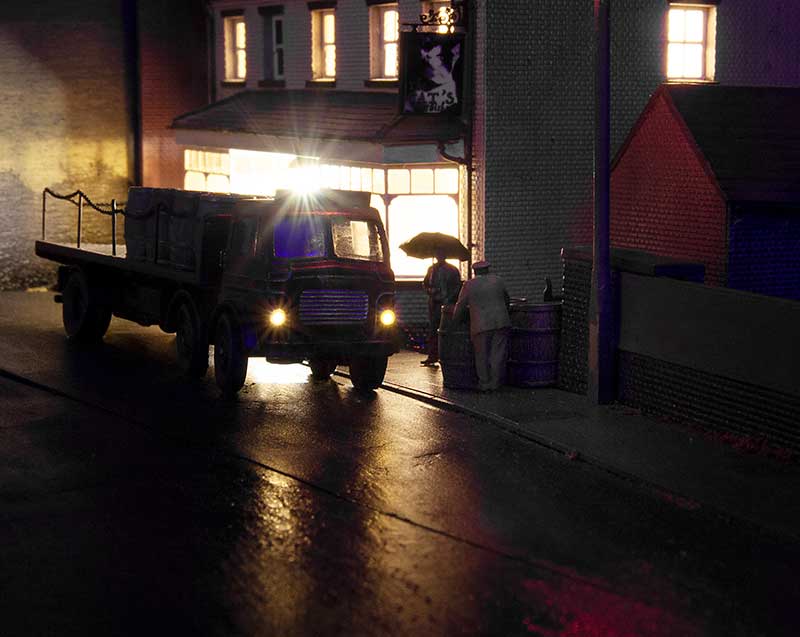
I wasn’t all that happy with the positioning of the yard lamps shown last time. The one on the right masked the tail lights on the lorry (as several people didn’t notice them) and it didn’t do enough to light up the entrance to the yard. Leading a couple of people to enquire how the lorries actually got in. So I’ve had a bit of a fiddle.  I’ve moved the light further along so that the back of the lorry is in shade. This on its own didn’t do enough to illuminate the gate area so…
 I’ve added headlights to the lorry. (this picture was taken on a phone). They are much to bright really but you can’t see them from the front of the layout anyway.
  Here is what I was aiming for. Again its too bright for a lorry of that era but I’m happy with a bit of artistic licence for effect. You can see the difference when the headlights are blocked (on the left).
I have also been busy with more AK interactive wet effects fluid. Below are a few overviews that give a better hint of the rain. 

 Finally another video, time for another cuppa and a biscuit!
Return to the factory
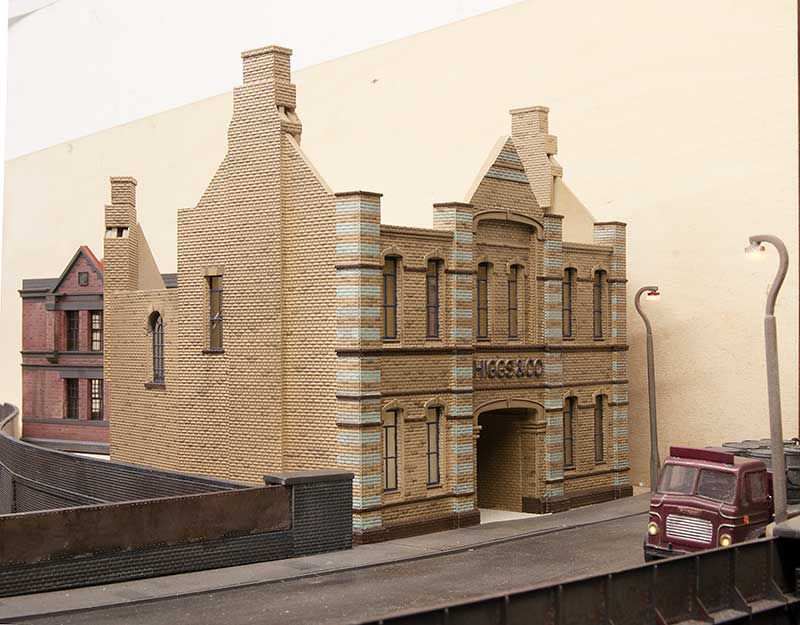
 Although the factory was essentially finished for Scaleforum it lacked the clutter that gives it an ‘in use’ look. Unless the workers were meticulously tidy I suppose. So I have gone back to make a bit of a mess. The image above is the before shot…
 …and the after.
  I’ve added a wall and gate to the entrance. The old lorry was featured earlier.
  The wooden boxes are from 4Ground models. I knocked up a rudimentary travelling crane from bits of brass and plastic. The discarded machine tools were 3 d prints and originally intended to go inside the building but I thought they were a bit too nice to hide away so I weathered them up an dumped them outside.
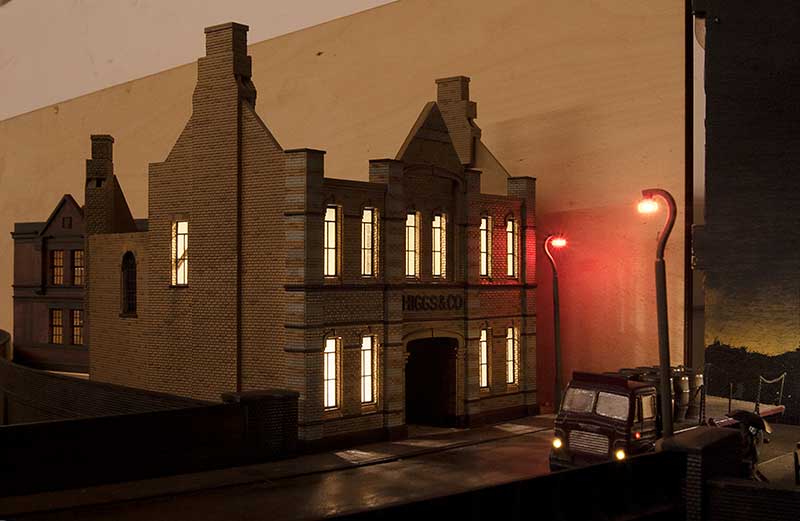
  Another crane from bits of brass and some basic yard lights. Below are a few images of the factory at night. The yard lights do provide a bit more light to the centre of the layout.

