Bit of pick ‘n’ mix
Bit of a pick ‘n’ mix post this one.
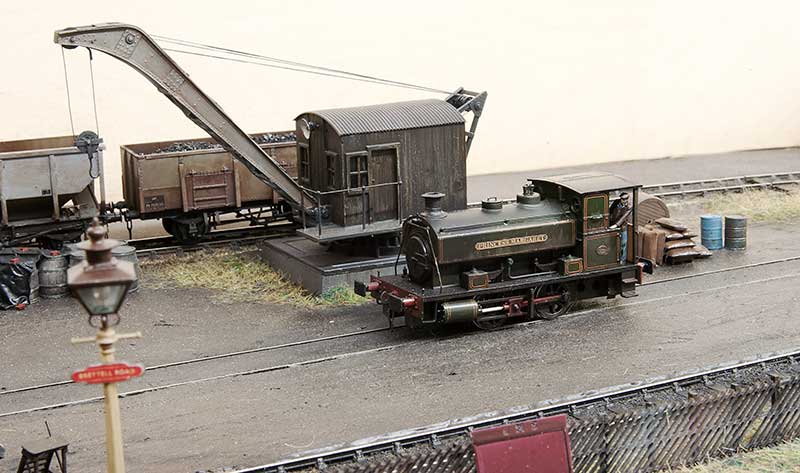 Lady Margaret now has her identity thanks to some custom nameplates from Narrow Planet
Finding your own compromise
When it comes to plastic kit building it helps if you think of a line. At one end of the line you have the kit as supplied, built as per the instructions with no attention or research what so ever on the prototype itself. At the other end you have the kit, researched, wrong parts replaced or corrected and superior parts substituted, as much extra detail as you can manage. Rumney chassis kind of thing. Inevitably we all need to find our place somewhere along the line that we feel comfortable.
This place can be influenced by several factors.
Cost – adding a lot of extra parts can mount up to quite an expensive model.
Expediency – high end models take a lot longer to build. Do we have the time
Reliability – no point adding every little detail if in use you’re going to knock it all off again.
Usage – if you wagon is part of a train of 30 that are only ever going to trundle past at a scale 40mph are you going to have the opportunity to notice the extra work?
Consistency – no point mixing highly detailed and basic kit builds together really.
Volume – how many models are we going to need?
 Heres my pretty much standard position along that line. The base model is a parkside kit. As mentioned elsewhere I’m not particularly worried about compensation or springing on a 10ft wheelbase wagon but i do use it for vehicles longer than 12ft wb.
A – brass tie bars. I use 0.8mm L section. the real things aren’t L section but i use this for strength and you cant tell unless you turn the model upside down. In plastic kits the tie bars are a real weakness ad they are either bendy, get broken or to avoid those 2 things, massively thick.
B – break hangers from Bill Bedford – It doesnt take much to add a little finesse to the brake gear and trick the mind into thinking its all a bit more refined that it actually is.
C – metal buffers, or in this case metal buffer heads. Unless your kit comes with metal buffers already lets be honest here, the plastic ones are going to be awful. These are MJT buffer heads.
D – couplings. A whole discussion on compromises in itself. In my case I use Smiths which i know are overscale but they are (quite) easy to use in operation.
E – brake pipe from Lanarkshire models.
Glue
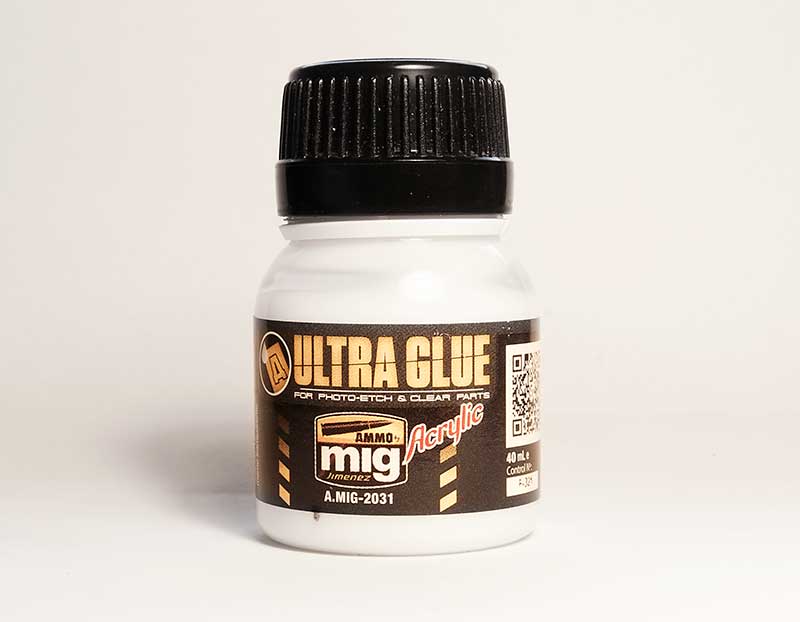 Ive recently been trying this stuff. Ultra Glue from MIG for etched and clear parts. Its water based so can be thinned if required and so far it seems to do the job at least as well as superglue. Its especially good for fitting name plates as while it has good grab it takes a few hours to fully harden and being water base any that creeps out can be lifted off with a wet paintbrush.
Reading
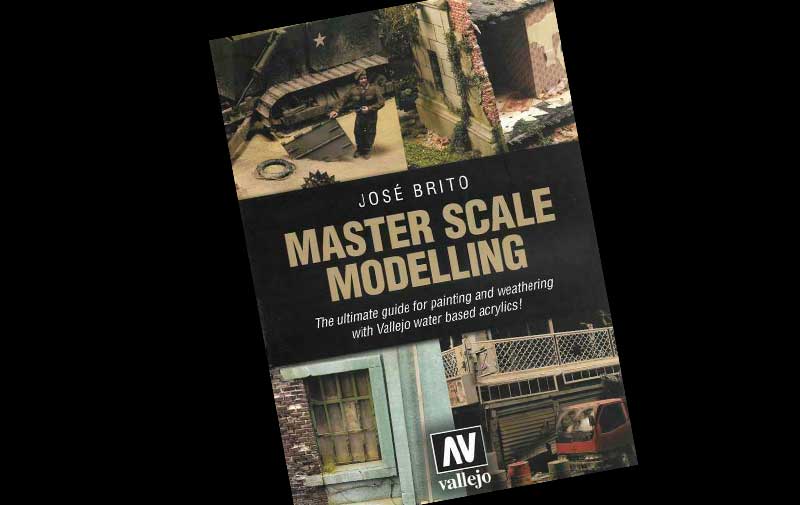
It’s been an awful long time since Martin Welch treated us to his ‘bible’ the art of weathering. And while still essential reading things have moved on a bit, especially so in the last few years or so. Some of the paints Martin used are no longer available (Humbrol tarmac for example) but theres a whole market now of weathering paints and materials. This (rather large at over 500 pages) book is an excellent window outside of our sometimes a little comfortable railway world.
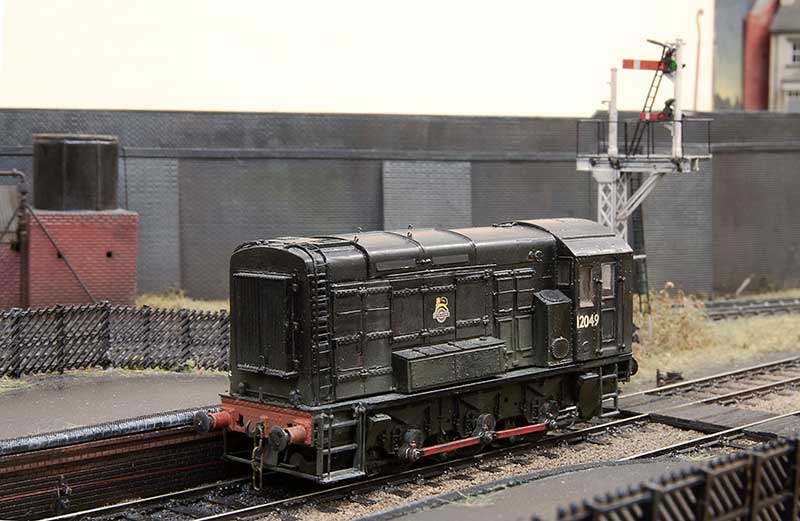
Having had a little trundle to Stourbridge shed and back for some Diesel, Class 11 shunter 12049 waits for the nod back into the yard at Brettell Road.
New stuff
With the growth of 3d printing theres been quite a few new companies appearing this year offering 3d printed products. The quality of these can vary somewhat and many show CAD renders on their sites so you can’t be all that sure what you are actually going to get. Ive mentioned 3d Printing corner before on my road vehicles thread as supplying some good stuff and recently I’ve been equally impressed with Model Railway Scenes as supplying equally high quality bits and pieces. Some of which are shown below.
The salt and grit boxes come a pack of 4 (2 of each) while the platform litter bins (ideal for New Street) come in 12. The oil drums (which incidentally are a close match to the Bachmann ones although these are a fraction shorter) also come in packs of 12 while the 2 different sized lineside relay boxes come in packs of 6 each. None of the stuff I’ve had so far show any of the layering you sometimes see from a 3d print.
Another new (to me) product that I’ve come across recently is this…
 Mr Surfacer liquid filler. It seems to be something that the aero-modellers are familiar with as they use it to fill unwanted panel lines. It comes in several grades, 500, 1000, 1200 and 1500 and much like sandpapers the lower the number the coarser it is. The 1500 also comes in black and they can all be brought as a spray as well. They can be used as primers although I haven’t tried mine for that use yet.
Links
A few more road vehicles.

Been tweaking a few more road vehicles starting with fitting better wheels (from RTI) to a couple of old cargos. The WH Smiths lorry seems to draw a lot of attention at shows and for many people sets a time and place quite specifically.

Next up another little batch from Oxford diecast waiting form my usual treatment…

… which is to paint the inside of the window apertures and wheel arches black and a quick spray of matt varnish before some gentle weathering. I might see if i can get some more standard looking wheels for the Land Rover.

The Volvo (760) required a bit more effort as out of the box (on the right) it did not capture the look of the real thing very well at all. The solution was to file the windows so that they are much deeper. I enlarged the windows of the Rover 3500 too but not by anything like as much. Wing mirrors are just a bit of microstrip.
Accurascale Buffers

Last year Accurascale turned their attention from the railways of Ireland to British rail. While people got very excited about their first wagon (not that the excitement wasn’t well deserved) i was more taken with their decision to sell the buffers separately. 3 types are available and come in packs of 8 for just £2.95. they come ready assembled and are sprung with plastic bodies and metal heads. The lack of a baseplate makes them ideal for the older style of wagon kits from Airfix (see below) and Cambrian and the older Parkside wagons where this detail is moulded on to the bufferbeams. Theres a smidge more work to use them on newer style kits that have the buffer bodies moulded on and you will need to source a baseplate from another source if your intended bufferbeam is completely flat. I like them and i really hope Accurascale continue with this modeller friendly approach.

Display shelves

Above is a couple of test shelves I did for a demo at DEMU earlier in the year. A variation on these shelves is now available from Tim Horn. If you missed the demo I will be doing a similar one (also on multiple units at next years Scalefour North. I’ll post details nearer the time.
Extreme etches – Apt I think!
 Some companies in the world of model trains are very aptly named such as Extreme Etches (Masokits is another one). The above example is Hood’s crest which is a 3 part etch for something only 3.5mm high! (I think i need to buy a magnifying glass if im honest)
That said just because something is small and fiddly doesn’t mean the design or thought process that goes into it is poor, quite the opposite in fact. There are many examples of add on bits that are, on the surface, easier but in reality due to poor design are a struggle. Things that don’t fit, are not the right shape or are nigh on impossible to put together (or stay attached to the model). Those who were around in the 1990’s will remember the craze of hacking great big holes in their models to stick on etched bits that if you took a step back and look at properly were worse than the molded stuff you had just sent to the bin. Sadly there are still companies producing stuff like this but at least we have a choice that if we are going to do something, we can do it properly!
21st July 2011

I have always liked the MJT torsion bogie and (given that I need so many) decided to etch my own, incorporating a few changes to make building them quicker. In the end the center wire was replaced with 2 pins and these merely hold it all together and dont use any form or torsion control at all. The control now comes from the cross wires between the brake shoes.
These bogies are now available from Brassmasters,click here for more information.
17th March 2009

Been busy working on the ex LNWR building that can be found at the Wolverhampton end of platform 1, Proving that not all things on a big layout have to be huge I had a spot of fun making a 4mm scale padlock for the shed that is hidden under the Hill Street Bridge. The penny is for scale!

With the help of WFRM I have produced etches to represent the c1/8 Concrete signalling troughing found lineside. More info and prices are on the goodies page.
22nd October 2007

My detail parts to improve the Bratchell class 318 EMU and class 150/2 DMU are now ready. For more details and pictures see the goodies page.
30th July 2007

My latest etch is wheel inserts to replicate the SAB resilient wheels fitted to class 86/2’s onwards.
See the goodies page for more info