More wagons
 What you see above is a variation on a theme, both started out as Parkside kits for the same wagon (although different generations of the same kit) and both have been built to represent something slightly different to what was intended. On the Left a clasped brake version achieved by substituting the supplied chassis for a PA16 chassis kit from the same supplier. On the right the supplied chassis modified with vac cylinder and tie bars (0.7mm L section from Eileens).
 A selection of steel opens built pretty much as intended. The far left is a Red Panda kit the others are Parkside with the usual extra detailing. It’s good to see that the Red Panda kits have reappeared from Parkside although the example shown here remained available continuously.
 I decided I quite likes the idea that when the building shown in the last update was abandoned an unfortunate lorry was left behind too. Perhaps it wouldn’t start or its been dumped there? Having mooched around for a suitable victim I quite fancied a kit rather than ready to plonk and I havent built a vehicle kit for a while. I settled on a Coopercraft Bedford ML and set to work.
The kit is quite poor if i am honest. There’s loads of flash and the fit of the parts isn’t great. I also decided that the windscreens were far too small but being all plastic it’s not too much hassle to fashion something presentable and as I’ve mentioned before I find poor kits strangely rewarding. I attacked the bed with a circular saw in a mini drill to gouge out some of the planks and simlulate rot. The above is the more presentable side!
 On this side I cut off a wing and cut down the tires to simulate flats. The rubber at the bottom was added with filler. The lorry was first weathered with a light blue to simulate fading, varnished and then gouache was used for the rust. another coat of varnish and washes of enamels were added to simulate dirt and grime. Finally the whole thing was dry brushed with Klear to make it look wet.
On the subject of road vehicles I will be doing a demo at Scaleforum this month so please stop by for a chat if you are going.
Tanks and Trucks
Not the sort with tracks and a large gun sticking out of the front but storage tanks
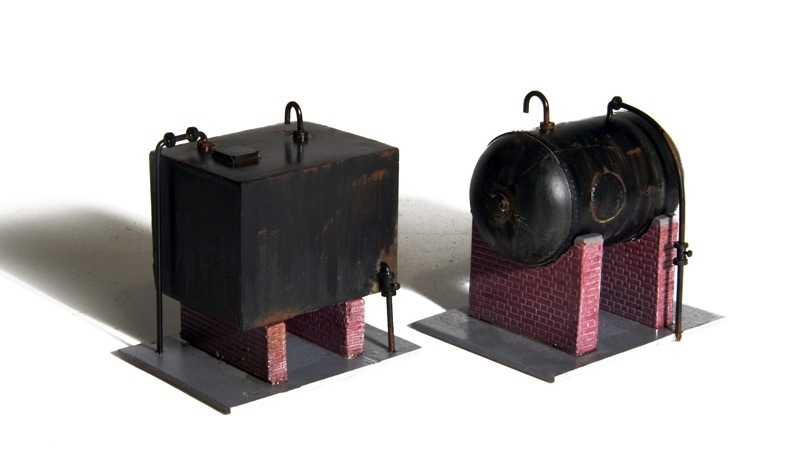
These are resin kits from Unit models with a bit of extra detail added. If you are not familiar with Unit models they are a little company with an extremely useful range of bits and bobs for scratch-builders – well worth checking out their site.
A pet peeve I have is really nicely modelled layouts with ever so shiny road vehicles that are clearly tipped from the box. These are usually done by quite skilled modellers who wouldn’t accept such a thing if it was a rail vehicle but are happy too for cars, trucks and vans. Odd then that I’ve just done a lorry for Brettell Road that is deliberately shiny!

You may have thought that the tanks look shiny too and you would be right. Part of the plan to model Brettell Road is to model it in the rain. I’ve seen layouts that depict snow but never rain which is a tad odd when you consider that in the UK on average it rains for 1 in every 3 days! This lorry is effectively a freebie, using left over bits from lorries done for New Street.
I realised that the picture of the double slip that isn’t in an earlier post is a bit confusing. However once a spot of paint is added it becomes much more obvious which bits are used and which bits are not.
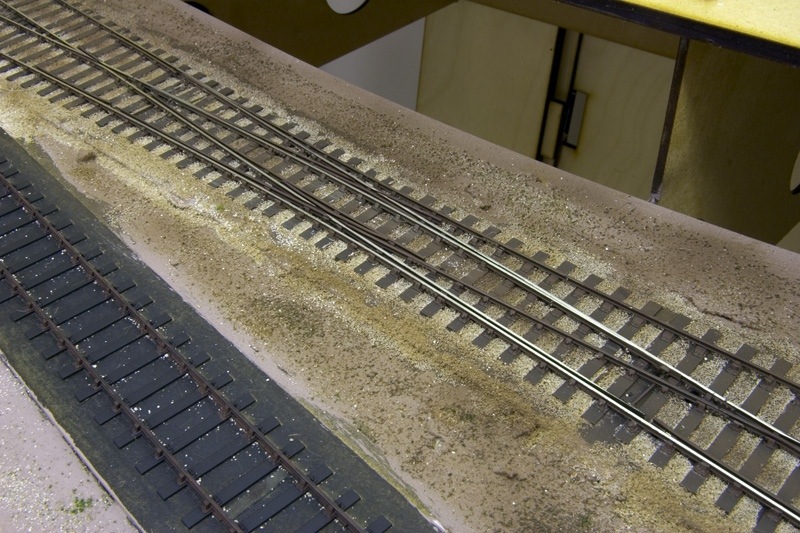
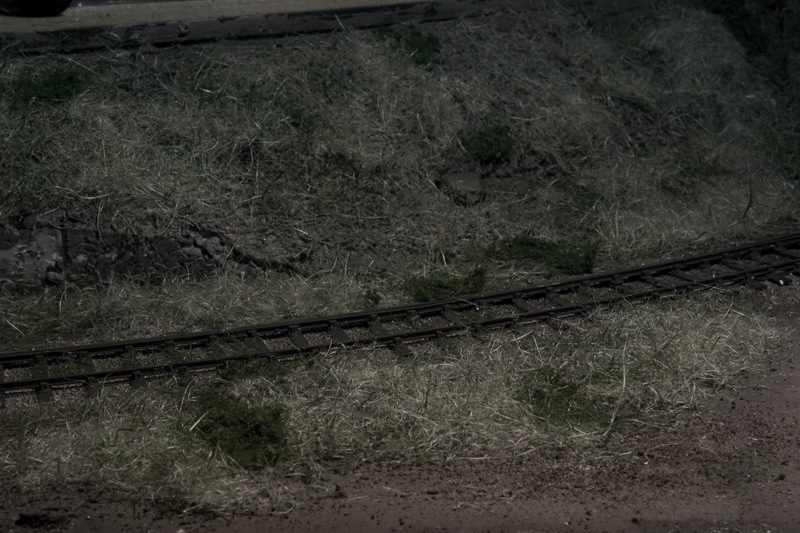
Finally a start has been made on the scenic side of things. Its early stages at the moment but the below picture gives a good idea of the effect I have in mind for the layout.
Transit, nearly there
 Well thats another transit van nearly done. Just need to add a tax disk and wing mirrors.
The smart little car with all the extras…
…is what ford claimed in a 1988 advert for their Fiesta. In 4mm scale the Oxford Diecast Fiesta has been out for a while now (and is an earlier version but it’s still very suitable for New Street.
First Impressions
Looks like a Mk1 fiesta to me. Comes with the usual manufacturing compromises of 2D printing on a 3d object and the now standard oversize wheels. I kind of hoped that Oxford had stopped doing this when they abandoned the separate tyres and produced the Marina model and while the fiesta hasn’t got separate tyres either the wheels are way too big. On the upside it’s probably easier to fix now.
 On the left, out of the box and on the right after a few easy tweaks. The model is held together with a screw and the rear licence plate as a sort of plug in wedge (bit weird!) so disassembly is a doddle. A spot of black paint on the widow frames and bumpers and a coat of matt varnish is all that’s needed. I decided this one would be parked so didn’t fit a driver. The wheels were pulled off the axle (you need to do this to get them out) and then remounted one at a time for turning down in a minidrill with some sandpaper. Take your time as you need to avoid them getting too hot.
 Finally a very light weathering and its done – I’ll change the registration at some point and add a tax disk. Reading up on fiestas the Mk2 version was essentially a facelift mk1 rather than a new car. They seem to look about the same proportions, any Ford experts care to advise if that’s the case?
Volvo FL6 part 3

Well that’s another lorry all but finished. I was quite pleased with how this turned out considering the castings that greeted me when I opened the box. You sometimes get a better sence of achievement building a poor kit than one that just falls together. Still to add are the windscreen discs, a driver, number plates and the mirrors.
Volvo FL6 part 2
I have to admit I’ve quite enjoyed getting to grips with this. The beauty of a white metal kit is that you can tweak it with low melt solder used as a filler. You don’t have to wait for it to dry and it doesn’t break away when you attack it with files and filler. I decided to do a solid sided box and do away with the windbreak in the end. I also replaced the marker/indicator lights and added the rainstrips from wire. The front panel, below the windscreen was filled with solder, sanded smooth and the panel re-scribed so that it was the same height at both ends! Below is where it is now.

Volvo FL6 from BW models
In the mid 1980’s Volvo developed a new medium sized lorry, the FL6 and a slightly lighter counterpart the FL4. the FL6 cab is quite a familiar shape and many were produced as Fire engines. For a long while I have been aware that BW models do a kit for the FL6 with a curtain side body and on hearing that they are planning to wind down the business in 2014 I ordered one.
Previously white metal road vehicle kits I have built have been very good. With the likes of ABS, Doug Roseman and Langley Models all setting the standard quite high. Sadly the same cannot be said for this kit.  This is the kit as supplied. The parts all fit reasonably well although there’s a lot of flash to be tidied up and some parts (main floor and roof) need to be bent back to shape. I replaced the front axle with a straight piece of bar as it sat too low as supplied. I soldered the kit together.
 Close up of the cab. While the bumper is pretty cleanly cast the cab itself is pretty awful as can be seen. I decided the best approach was to assemble the kit and then set to work on tidying it all up rather than to try and work on separate parts.
 The canvas is not much better with a load of imperfections in the kit. To be fair to the manufacturer I did nt contact them with regard to replacing the parts I was not happy with so I don’t know what their customer service would be like in this regard. The side is held in place with blue tag for the picture. Options are to replace it with adapted sides from the Hornby Curtain sided van (which you can tell is how the master was produced) or do a solid sided version.
At last, the sixties.
The title for this entry comes from a late 80s advert for the humble Mini. Perhaps “a mini adventure’ would get the point across easier to the current generation and might be a bit more apt given that’s kind of what its been!
 At the start of the process there were several routes to a model mini, the Springside kit, a HO version (under size), the Cararama version (over sized) or the Corgi one. Since then the Corgi one seems to have disappeared and there’s a version from Oxford Diecast. Sadly both Oxford and Corgi chose to do the earlier version which surprised me a bit. I feel Oxford missed a trick not doing a later one. I’m not talking about the BMC verses BMW type here either.
I chose the Corgi ones and first step is to strip the caked on pain off. For such a small model the paint all but destroys what is some quite nice detail underneath. It also suffers from the same problem as a lot of 4mm scale cars – oversized wheels.

Sticking with one original one this was a simple repaint with replacement wheels from the springside kit (as are all except the orangy one). From left to right numbers 2, 4 and 6 all have new grills again from the springside kit and new rear light clusters (from microstrip) they also have wider back windows and have had the door hinged removed. Number 4 has the original wheels turned down and wider wheel arches added from scrap brass strip added to the inside of the wheel arch and filler.
Number 3 was a bit of a challenge as I was given a springside Mini Clubman kit and try as I might I couldn’t get the kit to look anything like the real vehicle. In the end I just used the front of the nose and grafted it onto a corgi one. The same goes for number 5 (the estate) which started life as a van.
The result is a fleet of minis more suited to a late 80s layout. Still to do are the number plates and tax disks.
Cars
 Road vehicles are a good distraction from all the other projects on the layout and are also quick. By building them this way you can amas quit a lot without really noticing it. I have a 3 drawer Ikea box full so far, which as a project on its own would be quite a daunting task. The cars above are nearly finished except for number plates and tax disks. They are (left to right)
Austin Princess, from Oxford Diecast. I was concerned that the tyres looks too big but on looking at the real things, if the are, it’s not by much. Handily its screwed together so it’s a simple disassembly, matt varnish, add people and weather job. No excuse really for the tipped straight from the box onto the layout thing that (for me) ruins so many nice layouts. I also tided up the window frames while I was at it.
Mini – from Corgi but with new wheels and a more modern front grill from the Springside kit. I also enlarged the rear window and replaced the rear lights as well as removing the external door hinges.
Morris Marina – again from Oxford and treated as per the princess. Nice to see well proportioned tyres on the newer Oxford models.
Austin 1800 – this one is an old Minic model with wheels from a Cararama Mini (tip borrowed from Kier Hardy’s website). The tyres were cut in half as they were very wide as supplied.
All of these will be kind of old for my layout (the 1800 especially) and there’s still a big gap for 1980’s cars . However I believe a layout should have a good proportion of cars from at least the decade preceding the date it is set and really I probably should have at least as many cars from 1972 as models released in 1987.
Oxford Diecast’s VW transporter
 Recently released is the Oxford Diecast model of the VW Transporter (or type 2 (t3) or type 25). As these were introduced in 1979 and continued in production during the ’80s and into the 90’s in Europe its an ideal candidate for a brummy trader to be pottering around in on the layout.
The model features the end capped bumpers and round headlights that date it between 1980 and 1985 which means it could be either the earlier air cooled or the later water cooled variety. I don’t know if anything externally differentiates the two. (Hey i’m no expert I’m just reading this from Wiki!) My immediate first impression was that it looked too wide but checking the dimensions it seems to be spot on. For some reason the van version is left hand drive (the bus version isn’t) but features the seat configuration for right hand drive.
A quick hack
The steering wheel was removed (the model is screwed together by the way), the console above it cut off and both parts were relocated to the right hand side. While I had it in bits I added a driver. The inside of the window frames were painted black (the rubbers are printed on but the insides are white which looks a bit weird) and the bodyshell given a quick coat of matt varnish. I use this one by the way!
Once reassembled the model was given a wash of grime (dark grey for the sides and front, light brown for the roof and back) and the tyres sanded a smidge to give the van some weight (having glued them up solid first). I just need to sort out the rear view mirrors now.