An unremarkable little tank engine – Part 2
Thoughts turn to the remaining detailing on the body of my 57xx tank. I like to take pictures pre paint for prosperity before it all disappears under plain black and grime and no one really notices what you’ve done anymore!
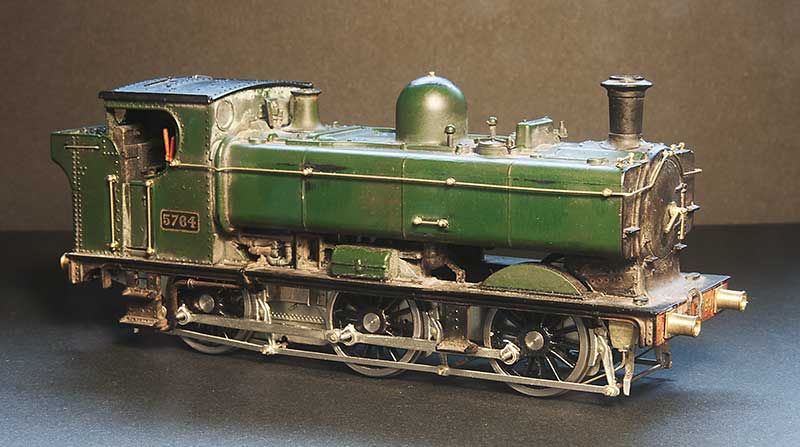
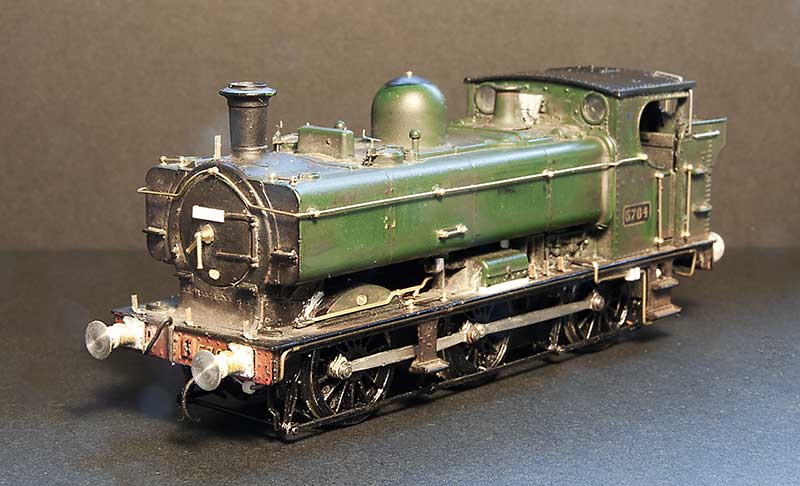 Front 3 quarter view. You will notice that the buffers are different. Due to a timely new casting arriving from Lanarkshire models. Lamp irons are from Masokits and the sanding levers from RT models.
  The footplate pipework has been replaced with wire The Whistle shield is from Modelu reinforced with a bit of wire. The tool box seemed a little ‘floaty’ as mainline had modelled it so I filled in the gap and re-scribed a finer one.
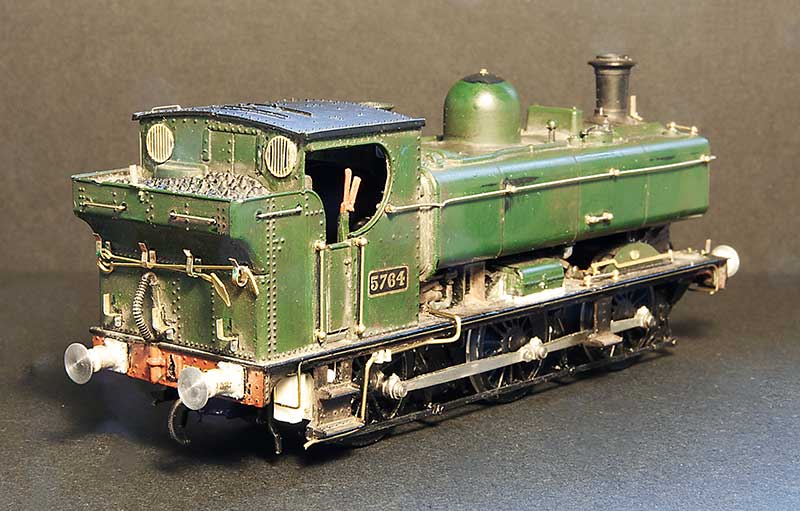 Rear view. The fire irons are from Springside Models and the rear windows from Mainly Trains (now Wizard models). I’ve thinned down the cab sides
 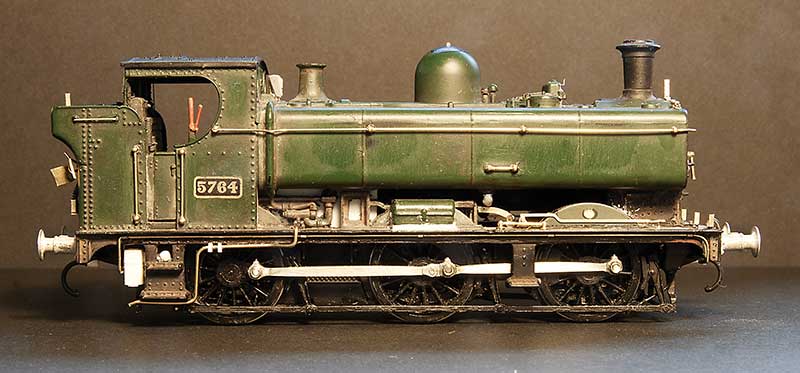 I tried to do the water balancing pipe as one piece secured by magnets but as its all a little bit small the magnets weren’t really strong enough. I had fears of it falling off and causing havoc with the inside motion so I had to settle for it being in 3 parts instead. Not sure what the little box is behind the rear footstep not all locos had them. I think it might be related to the AWS gear.
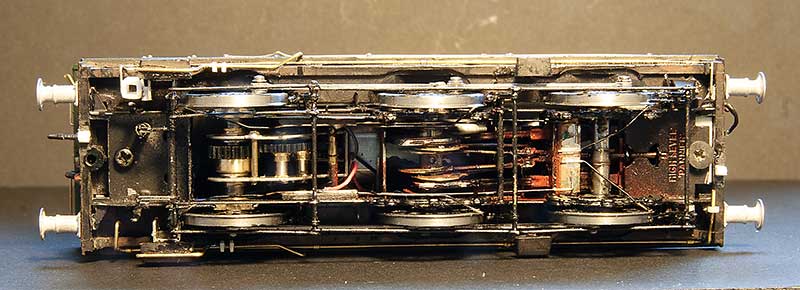
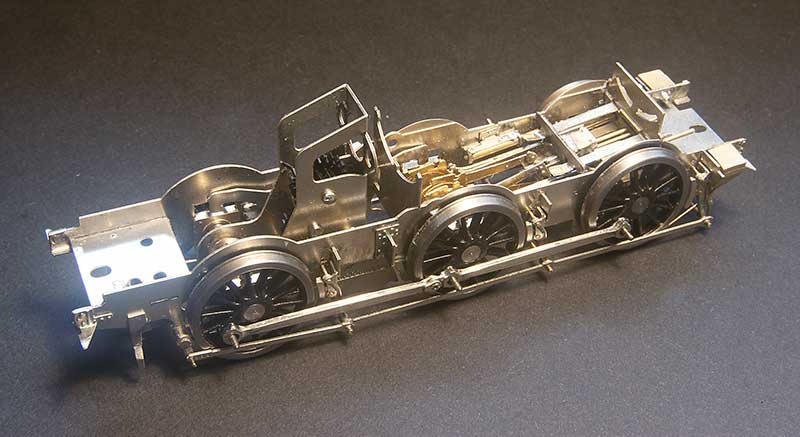
Underside view – you can just make out the way the pickups are arranged.
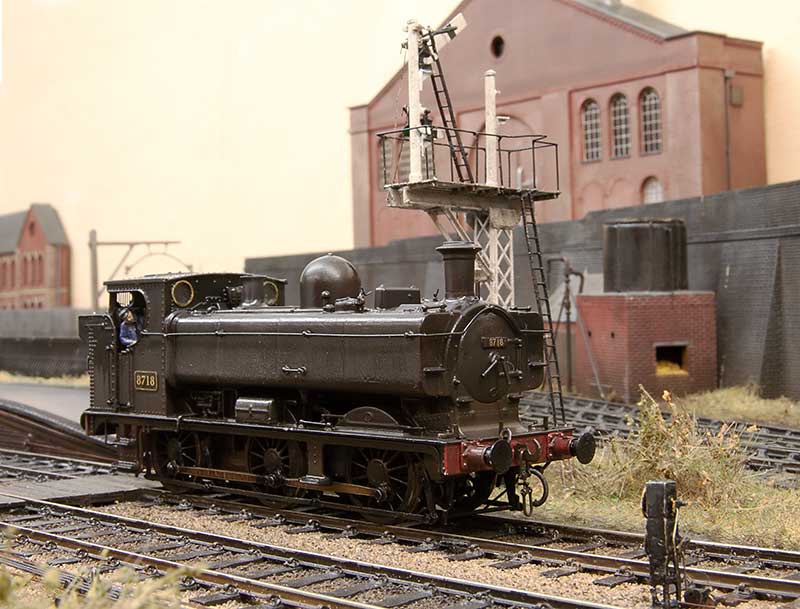
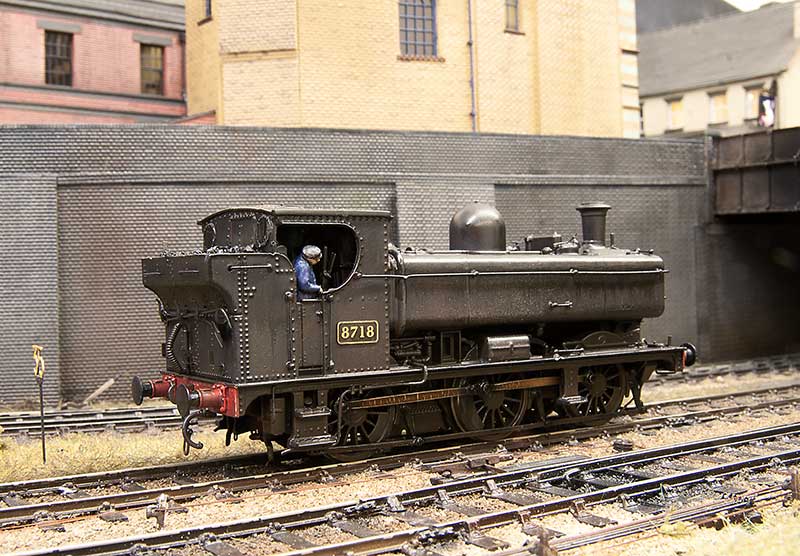
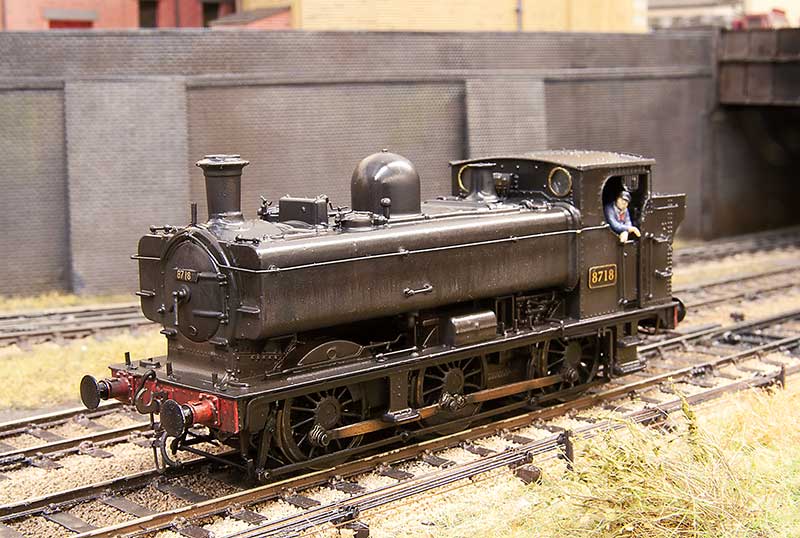
My intended victim for this model was 8718 which in Brettell Lane era was a Kidderminster Loco. It later went to Stourbridge where it lost its number plates and gained painted on numbers in a reasonable attempt at the GWR font. I preferred the proper number plate. Searching for pictures I couldn’t make out a BR logo on the tank sides. A request to the GWR modellers and British Railways Steam era 1948 to 1968 facebook groups didn’t yield any answers either so reverting to my ‘model what you see, not what you think you know’ approach I left the logo off.
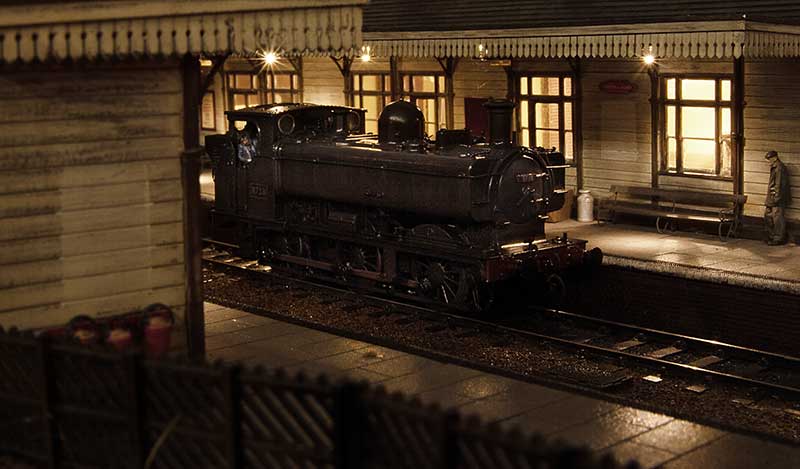
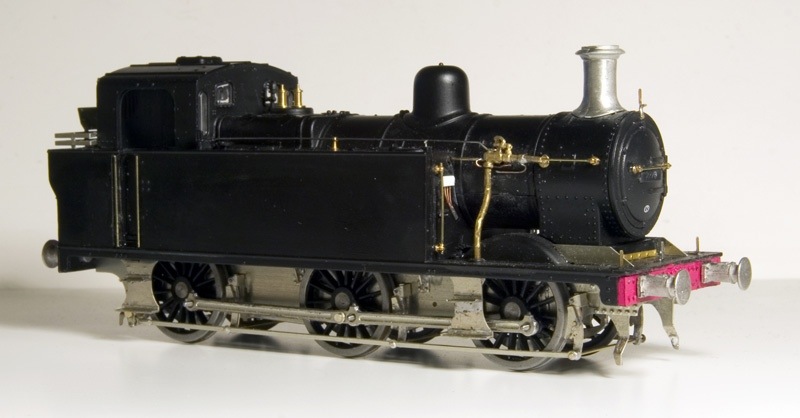
Below a few images of the finished loco. The crew are the customary Modelu products.
So there you have it – An unremarkable little tank engine.
An unremarkable little tank engine – Part 1
One of my slow burning projects has been a humble little 57xx tank. A combination of the old (But essentially quite good) Mainline body and a High Level Kits chassis but with a bit of twist.
Iain Rice wrote about these back in MRJ 61 and 62 using a similar route, in his case using a Perseverance chassis as that was what was available around the time, and I would urge readers to refer to this as a start point.
The High Level chassis
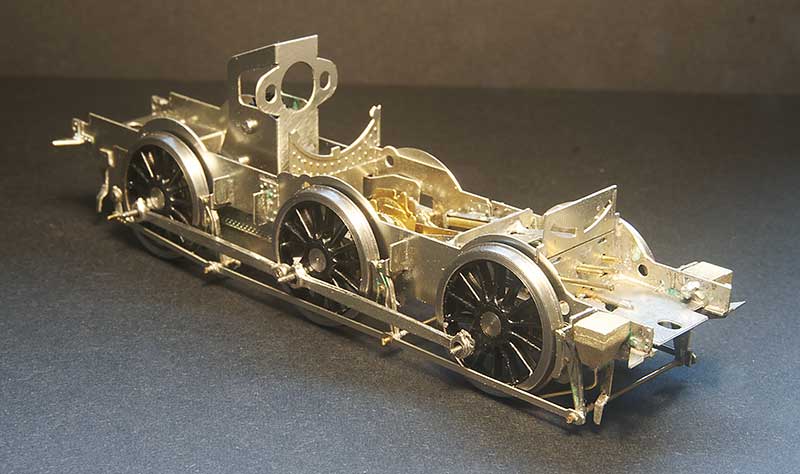 Like all of Chris’ chassis this was a joy to build (this is my 4th of his chassis kits now, who would have thought it?) I opted to use Brassmasters bearings which may have messed the alignment up a little as I found I needed to mount the break gear 1 mm lower than as supplied. Strangely though the buffer height seems fine. I differed a little bit from the instructions by making all of the brake gear removable. The rear rods that go behind the wheels seems to trap the rear axle in place as supplied.
Eagle eyed viewers might spot something little odd and yes, you’ve guessed it – I’ve gone off piste again.
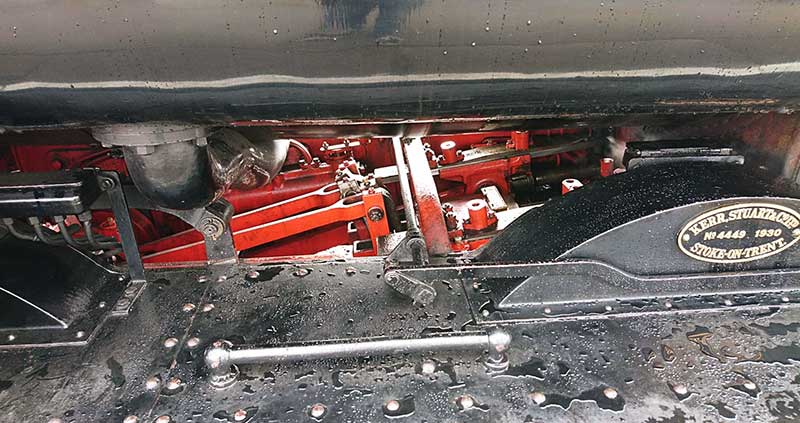
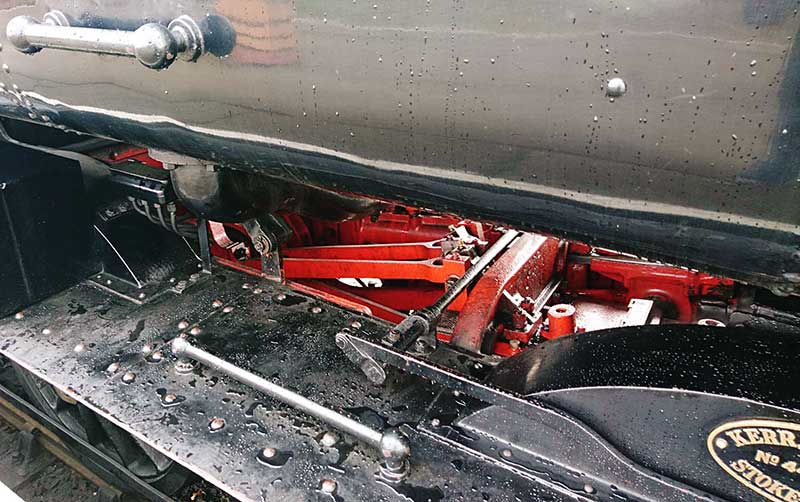 A couple of prototype pics from the Severn Valley. Personally i though the inside motion was pretty obvious looking at the real thing and while there is a representation of it in the High Level Kit I wanted it to move.
 So this is a mish mash of bits – Brassmasters 4f bits at the axle end and Finney GW bits at the front. The GWR version of inside motion seems much simpler that the midland one and the hardest part of this task wasn’t putting it all together but getting it in place. Being a small loco theres not a huge amount of wiggle room.
The body is essentially good, you could say extremely good for its time. The obvious stand out bit of weirdness was the top of the dome but nothing a spot of filing can’t sort out. It did come with a separate main handrail and some wire ones around the bunker but they were all a bit heavy so i replaced those along with those handrails that were moulded on. I reduced the size of the front wheel splasher by cutting it off and gluing it back on, The width of the cut being all you really need. I didn’t feel the need to fiddle with the centre and rear ones. While on my 94xx I replaced all the pipework under the tanks in front of the cab with this model I thought it was good enough as is, although I have cut away the ‘holes’ as per Iain’s article. Theres a bit more detailing to add to the footplate yet and the lower pipework will need to be replaced.
Soldering on
I’ve had an enjoyable few days soldering stuff. Not random bits of brass to make bits of overhead but proper kits, designed by someone else!
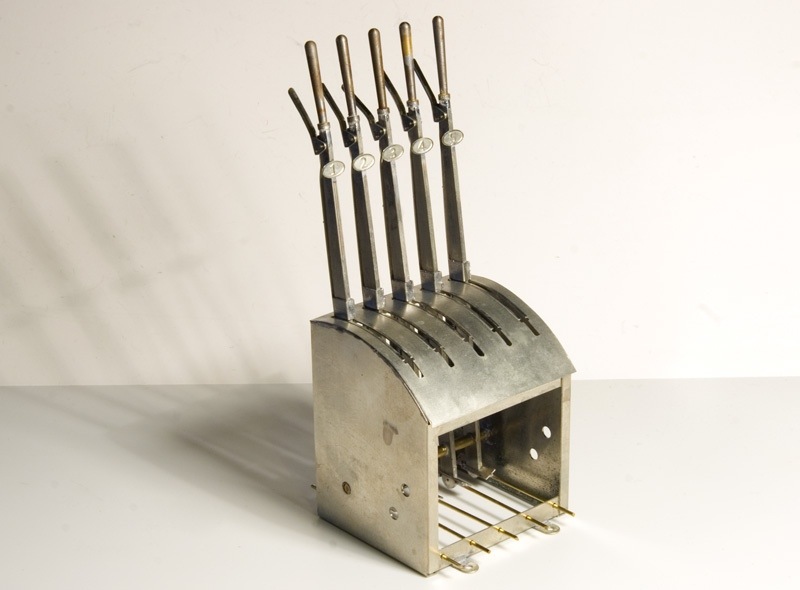
Starting with this rather nifty lever frame from the Scalefour Society. One of these can often be found on their stand at shows and it’s pretty hard to resist having a play with it. At one point I thought of getting one just because it’s nice! Now with Brettell Road I have an excuse!
It’s build as per the instructions. The kit allows for additional micro switches to operate point motors but in this case I’m planning a purely mechanical system.
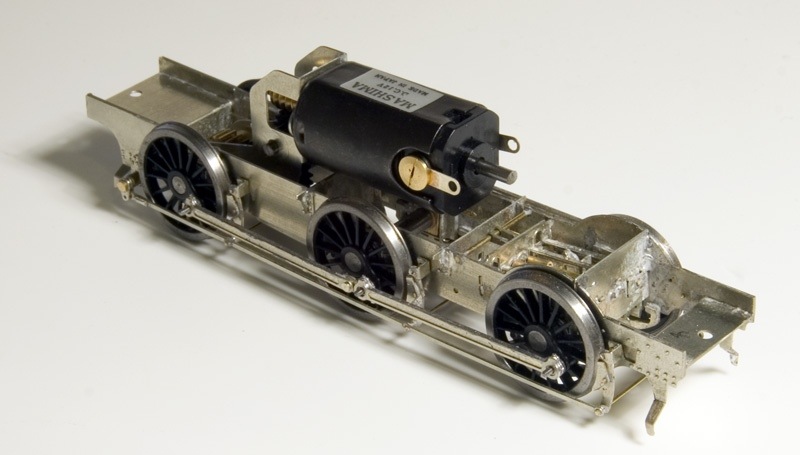
Next up the High Level chassis kit for my Jinty. As supplied the kit is designed for traditional compensation but I wanted mine sprung. The current fad for continuous springy beams seems like a lot of faffing about (I admit I’ve never tried it) and doesn’t really replicate what I see on real locos. The idea of equalised beams seems a whole lot more simple, uses less bits and is what the real thing does, (ok not a Jinty but think of a class 47 bogie).
Other than that I followed the instructions and for my first ever etched chassis I was surprised that it only took 2 afternoons to get it all together, I’m not sure why I thought it should take any longer to be honest. Obviously there’s a bit more to do yet, balance weights and pick ups.
Above a quick mock up of how it all looks. The steps don’t come with the kit and are from the Brassmasters detailing kit I used earlier. It’s something a bit different for me and it’s really nice that someone has done the thinking about it stage for you. Makes a change from assembling a load of unrelated bits and having to figure out what to do with them!